
React Core Concepts
Overview
There are several core concepts in React that are essential to understand in order to build effective applications using Next.js. These include components, props, and state. In this activity, we will explore each of these concepts in detail and see how they work together to create dynamic user interfaces.
Prepare
Components
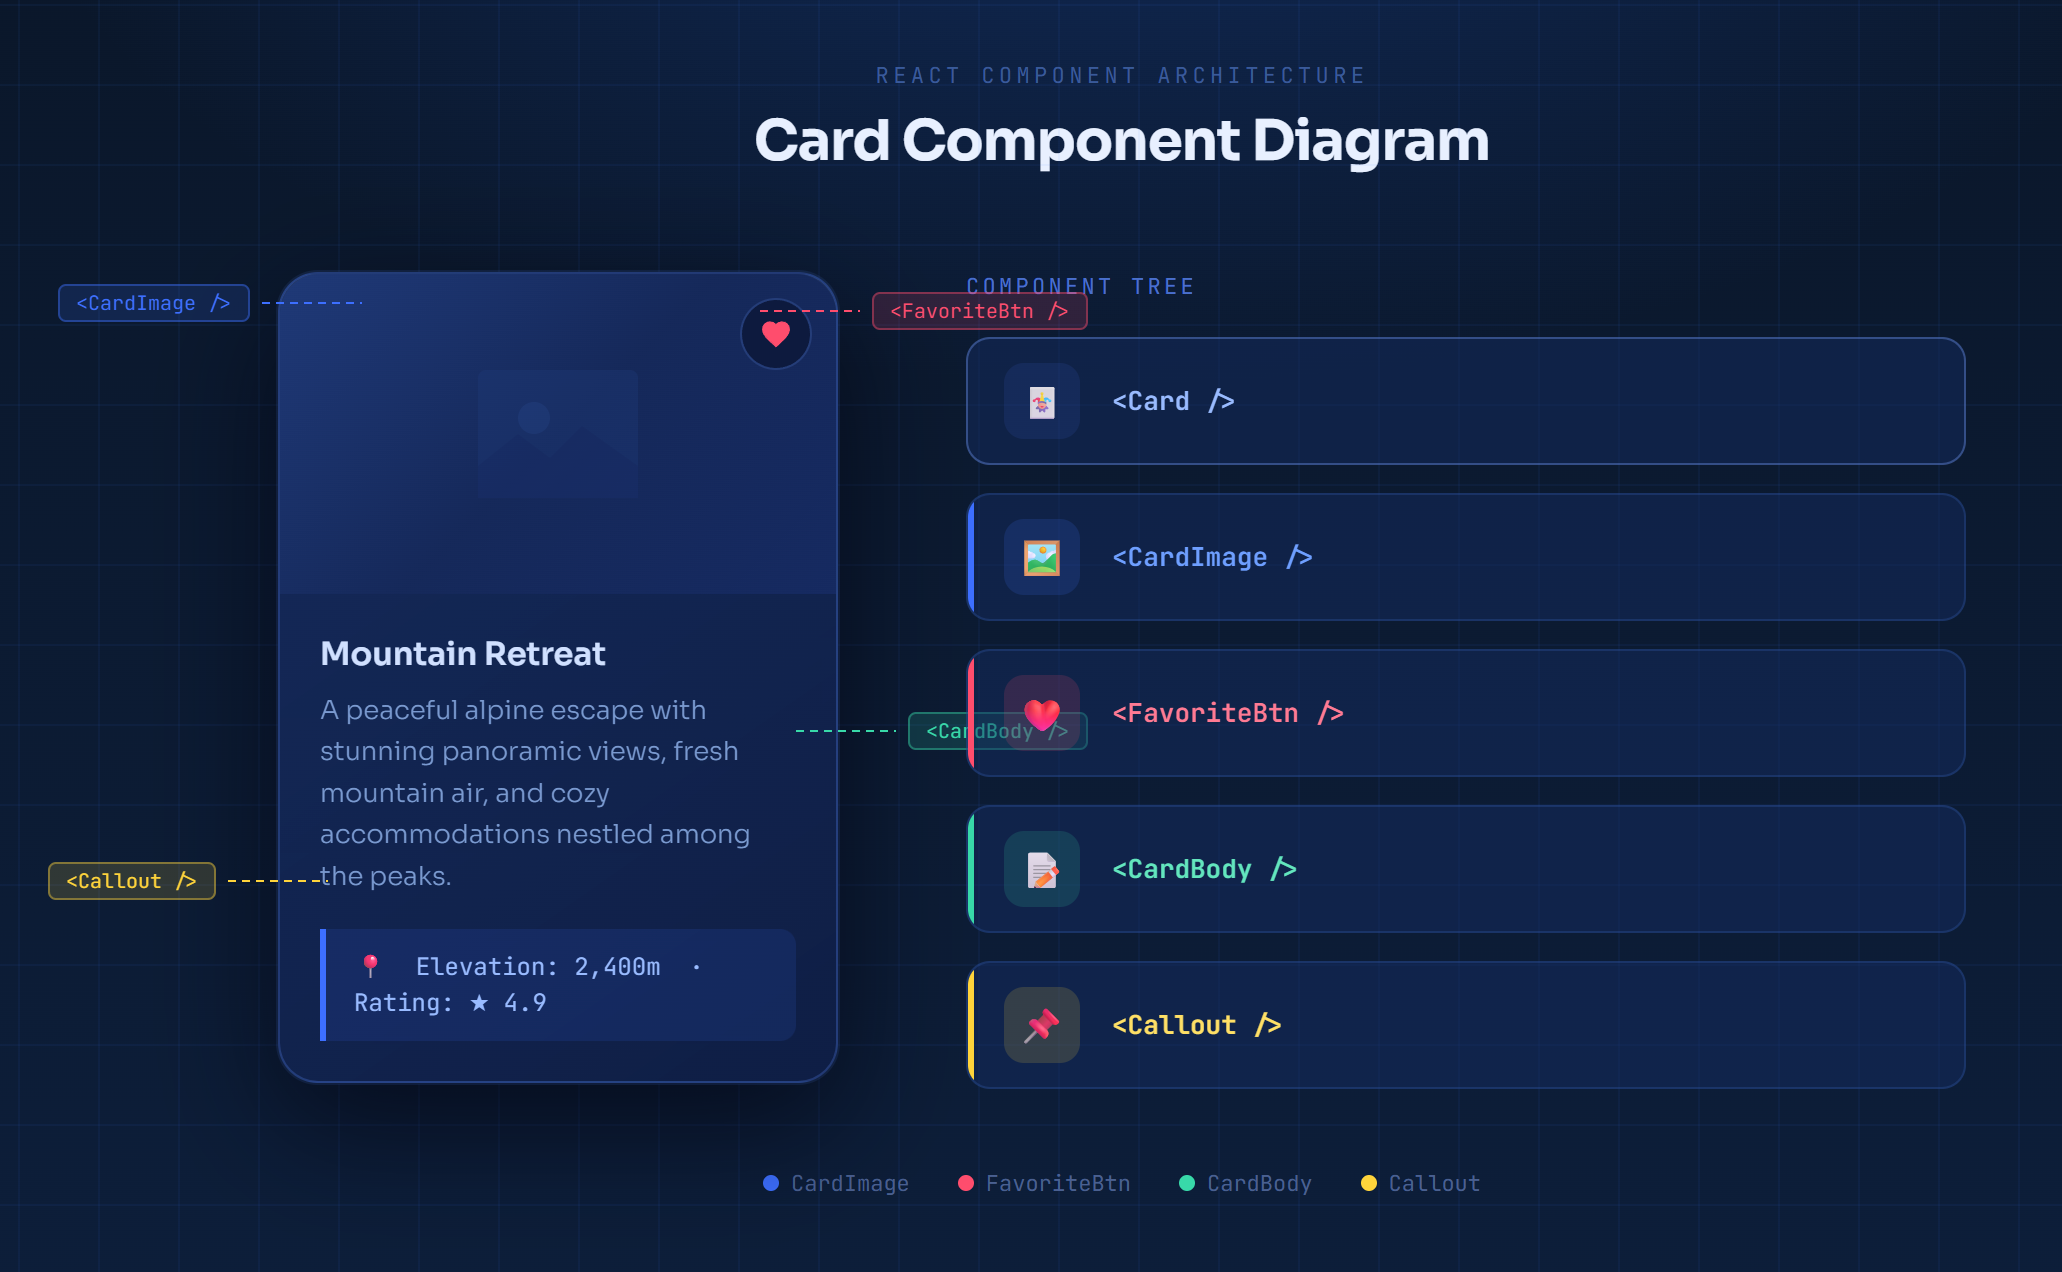
Components are the building blocks of React applications, which means they can be combined to form larger structures. They are reusable pieces of code that represent a part of the user interface. In this course, you will focus on modern functional components and use props to customize behavior and appearance.
Creating Components
To create a component in React, define a function that returns JSX. For example:
function Greeting() {
  return <h2>Welcome aboard!</h2>
}

// Usage
const root = ReactDOM.createRoot(document.getElementById('root'));
root.render(<Greeting />);
In this example, we have defined a functional component called Greeting that renders a greeting
message. The component is a simple function that returns JSX, and we render it using
ReactDOM.createRoot().
Using Components
When using components in React, there are a few important things to keep in mind:
- React components should be capitalized to distinguish them from plain HTML and JavaScript.
- Use React components the same way regular HTML elements are used, with angle brackets < and >.
- Components return JSX.
Nesting Components
Components can be nested within each other to create more complex user interfaces like plain HTML. When a component is used inside another component, it becomes a child component of the parent component.
This example creates a new component called Message. The Greeting component is nested
within the Message component:
function Greeting() {
  return <h2>Welcome aboard!</h2>
}

function Message() {
  return (
    <div>
      <Greeting />
      <p>We're glad you're here!</p>
    </div>
  );
}

// Usage
root.render(<Message />);
In this example, the Message component renders the Greeting component as a child, along with a paragraph of text. This simple example demonstrates how components can be nested to create more complex user interfaces.
Props
Props (short for "properties") are a way to pass data from a parent component to a child component in React. They allow you to customize the behavior and appearance of components by providing them with specific values. Props are read-only, which means that a child component cannot modify the props it receives from its parent.
Using Props
To use props in a React component, you can define them as parameters in the function that defines the component. For example:
function Greeting(props) {
  return <h2>Welcome aboard, {props.name}!</h2>
}
In this example, the Greeting component accepts a prop called name. The value of the
name prop is used to customize the greeting message. Note that curly braces {} are used to embed
JavaScript expressions within JSX. Any JavaScript expression can be embedded within curly braces in JSX.
Remember that expressions in JSX evaluate to a single value inside the curly braces. For example, you can reference an object property, template literal, returned value of a function, or use a ternary operator. You can't use an if statement directly in JSX without wrapping it in a function or using a ternary operator.
When you use the Greeting component, you can pass a value for the name prop like this:
root.render(<Greeting name="Alice" />);In this case, the Greeting component will render the message "Welcome aboard, Alice!" because the
value of the name prop is "Alice". Props are a powerful way to make your components more flexible and
reusable by allowing you to customize their behavior and appearance based on the data they receive.
Case Study: Iterating through lists
It is very common to render data as a list. In this example, a map() method is used to iterate
through the list and create a new array of JSX elements. For example:
function ItemList(props) {
  return (
    <ul>
      {props.items.map((item, index) => (
        <li key={index}>{item}</li>
      ))}
    </ul>
  );
}
In this example, the ItemList component takes a prop called items, which is expected to
be an array. The map() method is used to iterate through the items array and create a
list item (<li>) for each item in the array. The key prop is used to give each list item a
unique identifier. React needs a unique key for each list item, which helps React optimize rendering when any part
of the list changes.
This example uses index as a key for simplicity. In production apps, prefer a stable unique value
(such as a database ID) whenever one is available.
State
State is a way to manage data that can change over time in a React component. It allows you to create dynamic and interactive user interfaces by keeping track of information that can be updated based on user interactions or other events. In React, state should be treated as immutable and updated through state setter functions.
Using State
To use state in a React component, you can use the useState hook, which is a built-in function that
allows you to add state to functional components.
A hook is a built-in React function that lets you add features like state to functional
components. All hooks start with use (like useState, useEffect).
For example (this is a Next.js/module-only snippet):
import { useState } from 'react';
function Counter() {
  const [count, setCount] = useState(0);
  return (
    <div>
      <h2>Count: {count}</h2>
      <button onClick={() => setCount(count + 1)}>Increment</button>
    </div>
  );
}
In this example, the Counter component uses the useState hook to create a state
variable called count and a function called setCount to update that state. The initial
value of count is set to 0. When the button is clicked, the setCount function is called
with the new value of count + 1, which updates the state and causes the component to re-render with
the new count value.
State allows you to create interactive components that can respond to user input and other events, making your applications more dynamic and engaging.
Activity Instructions
Apply the concepts above in a small practice file so you can explain components, props, and state in your own words.
💡 AI Support: You are encouraged to use AI as a tutor to clarify React vocabulary, review your examples, and debug errors. Follow the WDD 430 AI Policy: use AI to learn and improve, but understand every line of code you submit.
- Create a file named react-core-concepts.html in your practice folder and add React, ReactDOM, and Babel scripts (as in the previous activity).
- Build one component that accepts a
nameprop and renders a personalized greeting. - Build one component that uses
useStateto track and update a count when a button is clicked. - Write 3-5 sentences in a comment at the top of the file explaining: what a component is, what props are, and how state updates trigger a re-render.
- Share your thoughts and findings with others on Microsoft Teams in the Week 01 Forum channel.
Check Your Understanding
<!DOCTYPE html>
<html lang="en">
<head>
  <meta charset="UTF-8">
  <meta name="viewport" content="width=device-width, initial-scale=1.0">
  <title>React Core Concepts Practice</title>
  <script src="https://unpkg.com/react@18/umd/react.development.js"></script>
  <script src="https://unpkg.com/react-dom@18/umd/react-dom.development.js"></script>
  <script src="https://unpkg.com/@babel/standalone/babel.min.js"></script>
</head>
<body>
  <div id="root"></div>

  <script type="text/jsx">
    function Greeting(props) {
      return <h2>Welcome aboard, {props.name}!</h2>;
    }

    function Counter() {
      const [count, setCount] = React.useState(0);

      return (
        <section>
          <h3>Counter Example</h3>
          <p>Current count: {count}</p>
          <button onClick={() => setCount(count + 1)}>Increment</button>
        </section>
      );
    }

    function App() {
      return (
        <main>
          <h1>React Core Concepts</h1>
          <Greeting name="Alice" />
          <Counter />
        </main>
      );
    }

    const root = ReactDOM.createRoot(document.getElementById('root'));
    root.render(<App />);
  </script>
</body>
</html>
Working Example
Submission
After completing all the learning activities for the week, return to Canvas and submit the W01 Learning Activities quiz.