W01 Setup: Create Your GitHub Repository
Overview
The purpose of this setup activity is to create a free GitHub account and set up the repository you will use throughout the course to store the web pages you will create.
GitHub is a popular and free online collaboration and version control service. You can think of GitHub repositories as a cloud-based storage system for your projects. GitHub can also be used as a web hosting service with a special web service named GitHub Pages.
Instructions
Please Note this Warning
If you already have a GitHub account, you do not need to create a new account with GitHub for
this course.
Skip to Step 2: Create Your Course Repository
Sign Up for a free GitHub Account
- In your browser, visit the github.com site.
- Select the Sign Up button.
- Enter an email address and select Continue.
- Create a password and select Continue.
- Enter a username using only lowercase letters. Your username will be visible to others, so
make sure to choose something professional. If you get a red '❌' to the left of your username, then someone else
has already used that username and you need to choose a different one.
Choose a professional name because you will use your GitHub account page in the future as a portfolio of your work.
- Record your username and password in a secure location.
- Complete the remaining steps of the sign up process which may ask if you want GitHub to send you emails and may have you verify that you are not a robot.
- You can skip any personalization questions by selecting the Skip Personalization link near the bottom.
Demonstration of Creating a GitHub account
Link: ▶️ Setting up a GitHub Account – [ 2:09 minutes ]
Create Your Course Repository
GitHub organizes work into a different repository (often abbreviated "repo") for each major project that you work on. In this step, you will create the repository that you will use for the entire course. Rather than creating a blank repository, you will start with a template that contains many files you will need for this course.
- In your browser, visit the github.com site and sign in to your account if you are not already signed in.
- Navigate to the starting template repository for this course.
- Select the green button "Use this template" and select the option to "Create a new
repository."
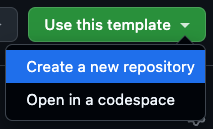
An example of the button to click to use the template. If you do not see the "Use this template" button, it is likely because you are not signed in.
- Do not check the box to include all branches.
- Ensure that your username shows up as the owner, and type
wdd130as the repository name.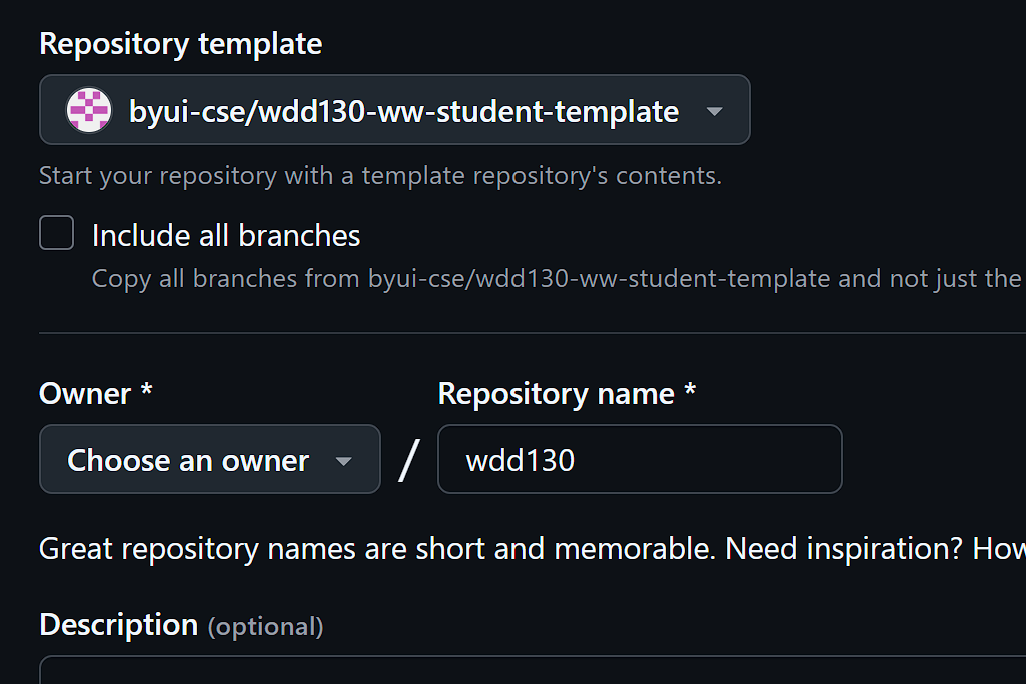
An example of the form to create a new repository. Important: You must use
wdd130as your repository name for this course. If you do not, you will not be able to submit your assignments.The help and grading tools of the course expect the repository to have this name and they will not work if you choose a different name.
- Mark your repository as public.
- Select the button to Create Repository.
Enable GitHub Pages
Now that you have a repository with the starting template files in it, you can set it up to host webpages by enabling GitHub pages.
- Navigate to your course repository at GitHub.
- The location, or URL, of your repository is:
https://github.com/yourusername/wdd130, but make sure to replaceyourusernamewith your actual username.
- The location, or URL, of your repository is:
- Select the Settings tab for the repository.
- On the left hand menu, select Pages.
- Configure the pages to build from the root of the main branch by doing the following:
- Leave the Source as: Deploy from a branch
- In the Branch section, select main.
- After selecting main, leave the location as "
/ (root)", which is the default. - Click the Save button.
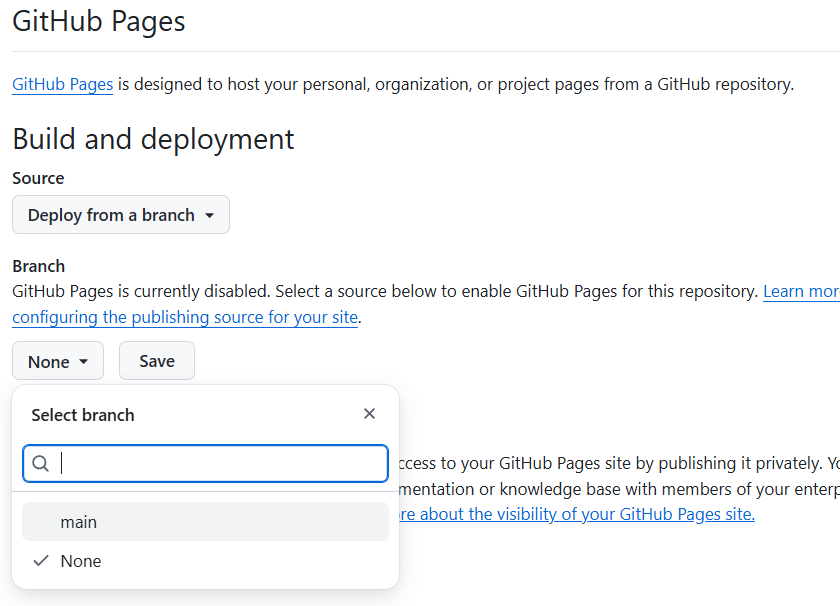
Screenshot showing the GitHub options for GitHub pages. - After clicking save, GitHub will begin building your website. It may take a few minutes for it to complete.
When it has completed, you will be able to visit your new website in a browser at the location, or URL:
https://yourusername.github.io/wdd130/, but make sure to replaceyourusernamewith your GitHub username. - Verify that your page loads in a browser. It should look something like the following:

An example of what your page should look like in a browser.
Please note that you now have two important URLs, which look similar, but are very different:
https://github.com/yourusername/wdd130– This is repository where you can see your code.https://yourusername.github.io/wdd130/– This is the hosted version of your webpage where people can view it in a browser.
You will use both of these URLs throughout the course.
Ask for Help or Help others.
It is very important to make sure that the steps above are working correctly. If you have any problems, make sure to ask for help from your teacher or fellow classmates. If your page is working correctly, you can help others.