W01 Setup: Tools
Overview
Welcome to CSE 341!
This week you will set up your computer with the applications you will use this semester.
Install Tools
If you have already installed a tool in a previous course, you may skip it and move on to the next one.
Visual Studio Code
You may choose to download and install VS Code from Download Visual Studio Code. You may also watch the following media content that includes helpful tips and tricks to help you work efficiently with this program. If you prefer, you may work with another text and code editor or IDE of your choice.
The following video may be helpful but is not required.
Microsoft Teams
Download Microsoft Teams to download and install Microsoft Teams on your computer. Microsoft Teams will be used for all course communication, discussions, troubleshooting, and collaboration. Once you have installed it, you will need to sign in with your BYU-Idaho email address. After logging in, you will see our class team in your list of teams.
Before you get started in Microsoft Teams, please take a moment to read about Microsoft Teams productivity tips and etiquette here.
Node.js
What is Node.js
Node.js is an open-source, cross-platform, backend JavaScript runtime environment that runs on the V8 engine and executes JavaScript code outside a web browser.
In short, it is JavaScript that can do a lot of incredible things. It is very commonly used for backend web development. We have the frontend which consists of HTML, CSS and a bit of JavaScript. We also have some sort of database where data is stored long-term. And we have some backend system that will connect the frontend to the database. This is what we will use Node for in this class.
- Open the official page for Node.js downloads and download Node.js for your operating system.
- Run the downloaded Node.js Installer, including accepting the license, selecting the destination, and authenticating for the install. This requires Administrator privileges, and you may need to authenticate.
- To ensure Node.js has been installed, run node -v in your terminal—you should get something like vx.x.x
- Update your version of npm with npm install npm --global. This requires Administrator privileges, and you may need to authenticate
- Congratulations! You now have Node.js installed and are ready to start building!
YouTube
Almost all of your code assignment submissions in this class will include a YouTube video link. You will use this video as an opportunity to demonstrate the tasks mentioned within the rubric of the individual assignments. As part of the course setup for this class, please ensure that you have a YouTube account created. If you need help doing this, this Google search for how to create a YouTube account may help.
If you have never recorded a video of you sharing your screen while recording your voice, that is okay. There are many free resources that allow you to create such recordings. Here are a few popular ones:
Git
GitHub is essentially a big database of source code for people all around the world. You can make your source code public or private and configure many different permissions and settings. Each project has its own repository, or "repo". This repository will be a clone of the one on your local computer. Thus, you will have three copies of your code:
- On your computer
- GitHub
- Render (where you will host your application)
Install Git
- Go to git-scm.com and choose the appropriate download for your operating system.
- Run the installer with the default settings (Windows: ensure that git will be added to PATH) and wait for the installation to finish.
- Restart VS Code if you have it open, and open a new terminal window by selecting New Terminal inside of the Terminal menu.
- In your terminal, execute
git --version. - If "git --version" produces an error, make sure git has been added to your PATH environment
variable, then restart VS Code.
Instructor Tip:
On Windows, Git is usually installed at
C:\Program Files\Git\cmd. This is the location that should be added to your PATH.
Git Setup Video Demonstration
The following video may be helpful but is not required.
GitHub
Create a new GitHub repository
Setting up GitHub
- Go to GitHub.com and sign up for a new account if you haven't already. If you already have an account, that is perfect, you can use it here.
- After creating an account, return to GitHub.com and sign in. In the upper right corner of the screen you should see a "+" icon. Click this and select "New Repository".
- Choose a name for your repository (likely cse341-node or something similar).
- Leave the repo public and do not check the box for a readme. Leave .gitignore and
license as "none".
Instructor Tip:
It's not technically a problem if you add these other files now, but it makes it a little more difficult when you go to push to GitHub for the first time, because you'll have conflicts that you'll have to resolve. So at this point, it's easiest to leave everything blank.
- Click the button to create the repository.
- On the page that follows, you should see a URL for your new repository (e.g., "https://github.com/username/repositoryname.git"). Copy this URL for use later on.
Sign up
Create Repository
Saving to GitHub
Connect Local Code to GitHub Repository
MongoDB
What is MongoDB?
MongoDB is a source-available, cross-platform, document-oriented database program. Classified as a NoSQL database program, MongoDB uses JSON-like documents with optional schemas.
For all of our projects this semester, our database for our data will be MongoDB.
Create MongoDB Account and Cluster
- Navigate to the MongoDB Atlas Site
- Select Start Free
- Fill out your email, name, and password to create an account.
- Choose the free option and select Create a Cluster
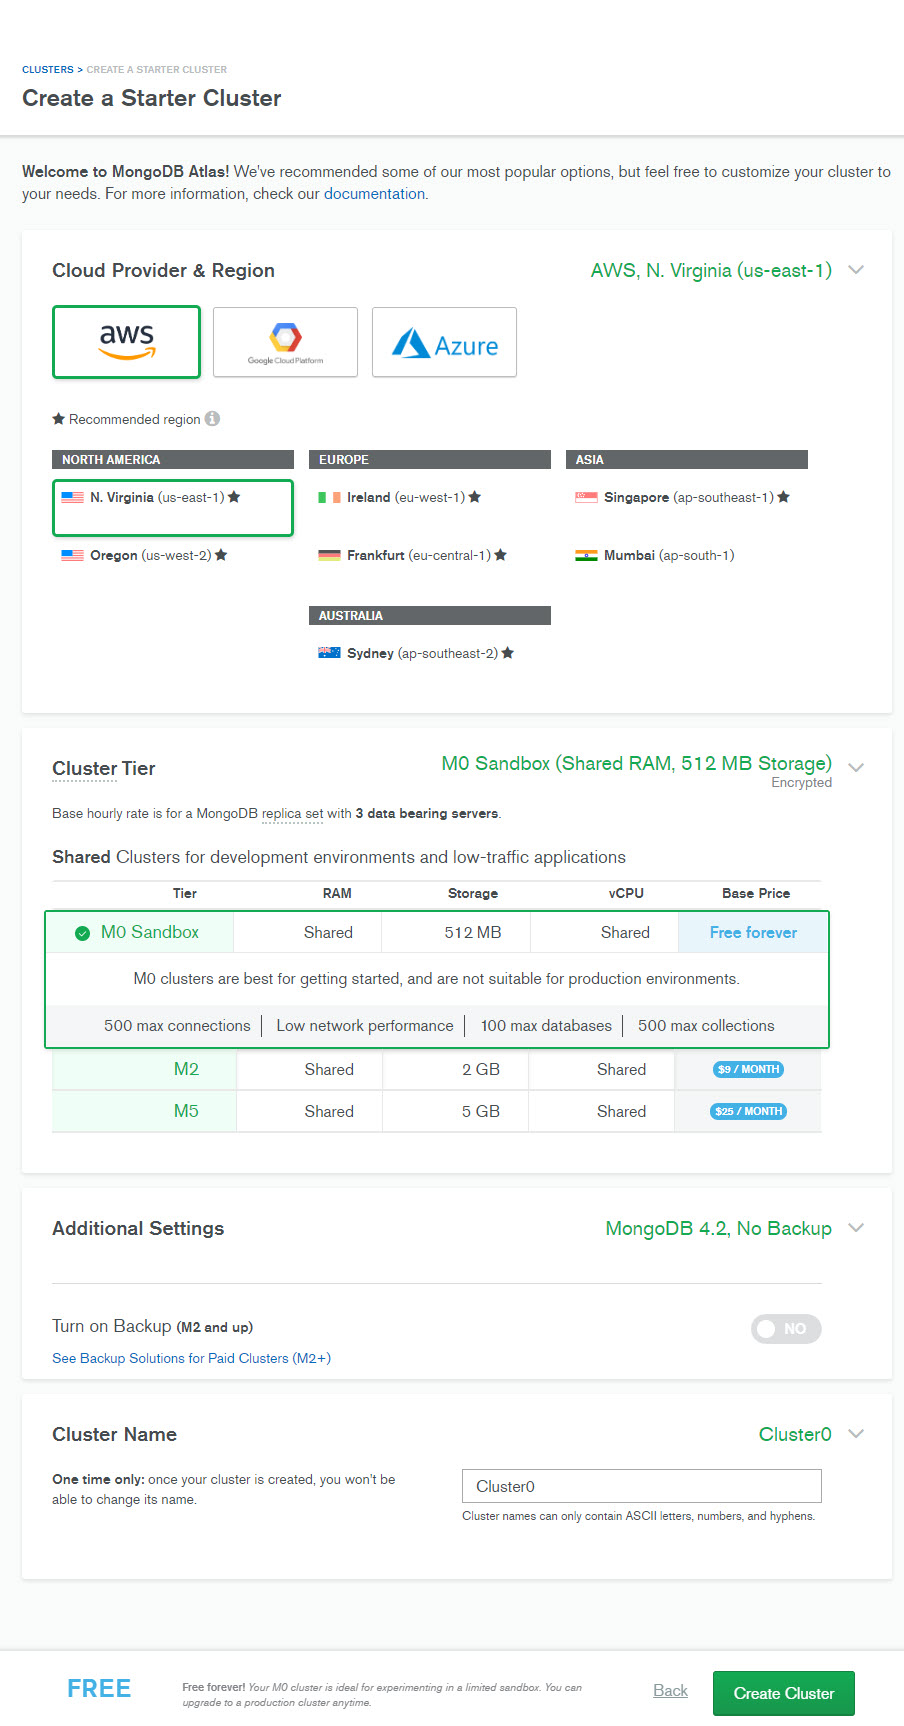
- Ensure that the configurations for the new cluster look similar to the following image and have the free options selected.
- Your account is now ready to go. You will not need to create another database account or cluster. During the semester, you will be able to add collections of data and manage this database, so make bookmarks where needed.
If you are having issues with this, please watch the following video from January, 2023:
The following video may be helpful but is not required.
Render
Deploying an API
A deployed API is the code is hosted and built on a platform away from your computer so that anyone and anything can access it via a public URL.
Deploying an API to be accessible anywhere is very similar to deploying any website. There are fewer options for deploying a backend compared to comparing a frontend, but there are many tools available to do this. Below is a list of several popular ones, but there are many more and they fluctuate frequently.
- A2 Hosting
- Heroku
- Amazon Web Services
- DigitalOcean
- Glitch
- Google Cloud Platform
- Microsoft Azure
- Platform.sh
- NodeChef
- Render
- Fly
- Railway
- Vercel
Why Render?
For this course, we will be using Render because it...
- ...has a great free tier for API deployments with Node.js
- ...doesn't require a credit card up front
- ...supports Node.js and has a strong community
- ...supports automatic deploys from git providers like GitHub
- ...easily deploys Node.js APIs
According to Render's website, Render is a unified cloud to build and run all your apps and websites with free TLS certificates, a global CDN, DDoS protection, private networks, and auto deploys from Git.
For this class, we will use it to deploy our web projects to the internet so that they can be accessed by anyone.
Account Setup
Create a Render Account
- If you don't have a GitHub account yet, please create one now. All information/videos about setting up GitHub for this class can be found on the GitHub page.
- Now that you have a GitHub account, create a Render account by going to the Render sign up page.
- Click on the GitHub button as your sign up method.
- Go through the steps to authorize GitHub and finish creating your Render account.
The following video walks through installing and configuration Node.js, VS Code, and Git:
Direct Link: https://video.byui.edu/media/t/1_6w25f9w5
Submission
There is no submission required for this setup activity. You just need to ensure that you have completed the steps above to be prepared for the upcoming activities.
Other Links:
- Return to: Week Overview | Course Home