Using the test iterations feature of the Squash allows the tester to execute each test plan more than once. This will be important to us
because as modifications are made to the software, we will have to execute the test cases again and again. Each execution is tracked so we can keep track of what worked and what didn't over time.
Create a test iteration
Squash calls a test execution an iteration. To create a new test iteraton, you must first have a test plan that you intend to execute.
Show the Executions screen by selecting Executions from the left navigating bar.
Select the test plan you wish to execute.
Click on the icon, then select Add an iteration from the add menu.
Fill in the Add an iteration dialog as follows:
Name: Use your first name and the week number (unless instructed otherwise in the assignment).
Reference: Leave blank.
Description: Leave blank or add a description of your choosing.
Leave the Do you want to copy the campaign execution plan? checked.
Completed Add an iteration dialog
Click the Add button to create the iteration.
Execute the tests
To track your testing you use the test iteration to guide you through the steps necessary to perform the test. You can start and stop the test at any time, squash will keep track of your progress. For each step you will mark the test results.
Select the iteration you want to perform.
There are 6 sections of information for the iteration you can access each section using the icons as follows:
Dashboard: Summary view of test iteration.
Information: Test details.
Planning: Start and end test dates.
Statistics: Detailed test result statistics.
Execution plan: Detailed execution steps.
Automation suits: Test automation utilities (we will not use this feature)
Click on the Execution plan: icon to show the detailed execution steps.
Click on the start icon to start a test.
Start test
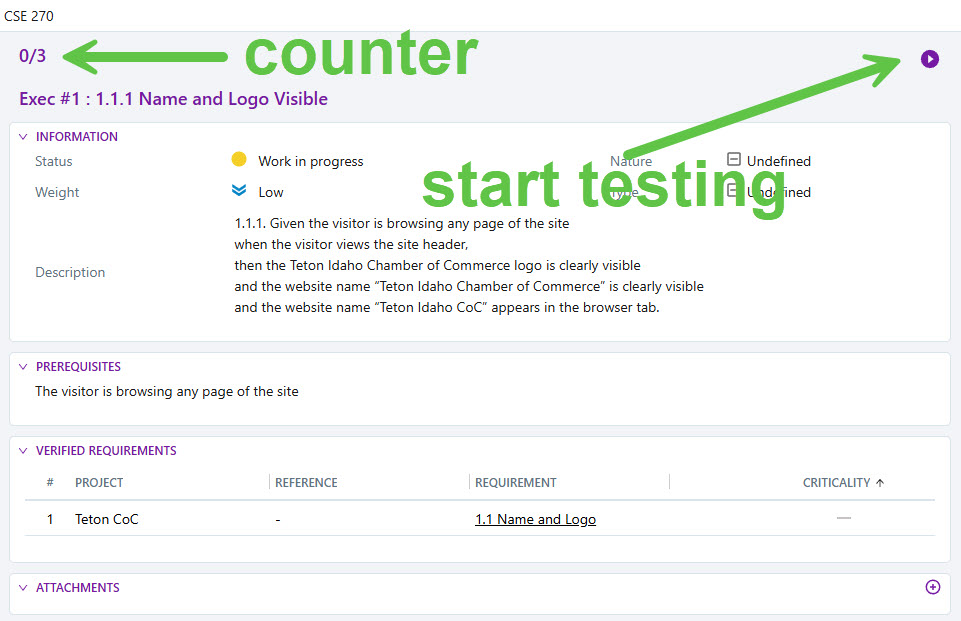
A new window will appear with your first test case. Notice the counter in the top left
Start test case.Press the icon to start this test case.
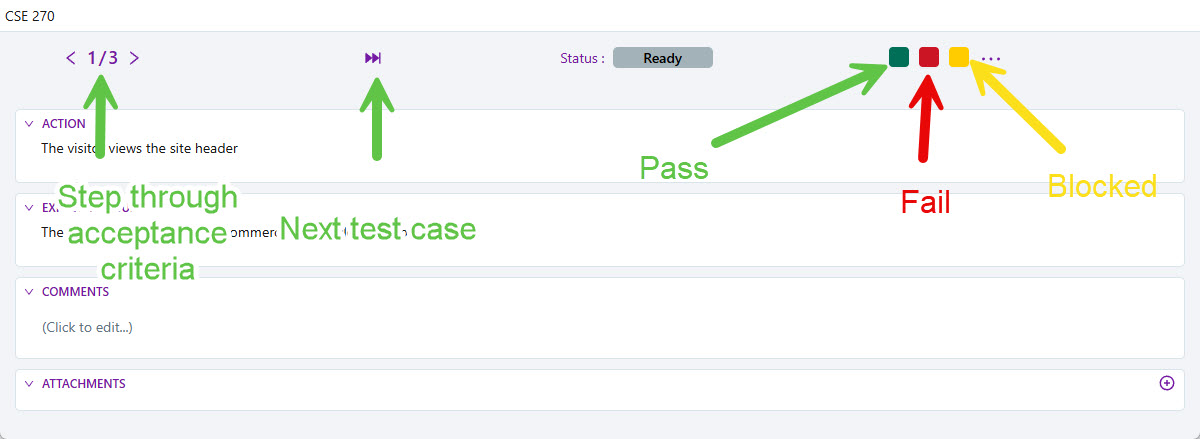
You should see a window that allows you to step through each acceptance criteria for each test case and record your test results. This screen allows you to step forward and backwards through each acceptance criteria, go to the next test case, record the test result, and add comments and attachments.
Record test results
As you perform the tests you can easily see the action and expected results. For failed tests add a comment to describe the failure. You can attach additional documents such as screen shots if necessary. When done record the test's result using one of the status buttons at the top of the screen. The test will automatically advance to the next step, or next test case if that was the last step for the current test case.
To help you know the correct status to mark, here are the criteria for each status:
Passing: All steps can be executed AND all expected results are found or experienced in the application. Example: Go to the Directory Page, click a business URL, the URL opens the website.Failing: Most steps can be executed BUT at least ONE expected result differs in the application from what is in the test case. Example: Go to the Directory Page, click a business URL, nothing happens, but it should open the website.Blocked: Not all steps can be executed, either because the program throws an error unrelated to the test being executed and won't let you continue, or something is missing that will not allow you to reach the validation point. Example: You are supposed to browse to the Directory Page to check the business URLs, but there is no link to the Directory page.
If even one step fails, the whole test case fails. After you have completed all test steps for all test cases in the test plan you will see the completion dialog, Click the confirm button, the dialog will close and return you to the the main squash window.
Tests completed
Congratulations you have completed a test plan!
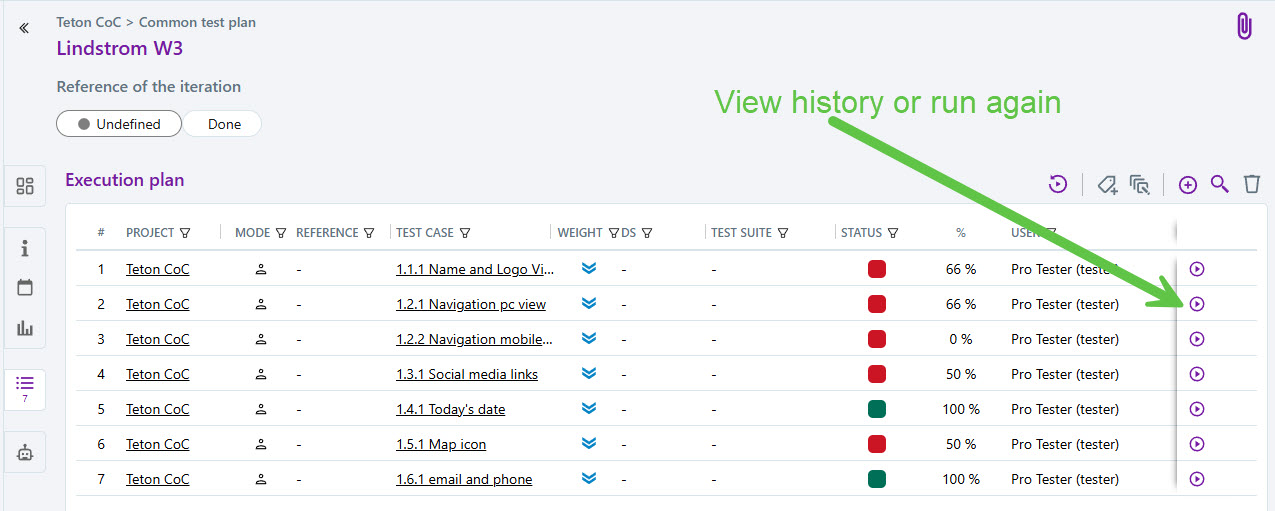
The execution plan list will be updated with the current status from the last test. You can run a new test or see the test history for individual test cases using the play button on the individual test case entry in the Execution plan list.
Updated execution plan
Reporting on Test Executions
Squash has many ways to view your testing progress. The info screen for the iteration is a great way to get a quick summary while you are using the system. Squash also has provides reports to show your testing progress and results. You will use the Execution progress report as your assignment submission. Use the following instructions to prepare your reports for submission.
Select Reporting from the Navigation menu.
Click the plus icon to show the reports menu.
Select Add a report.
Select the Execution progress report.
Execution progress
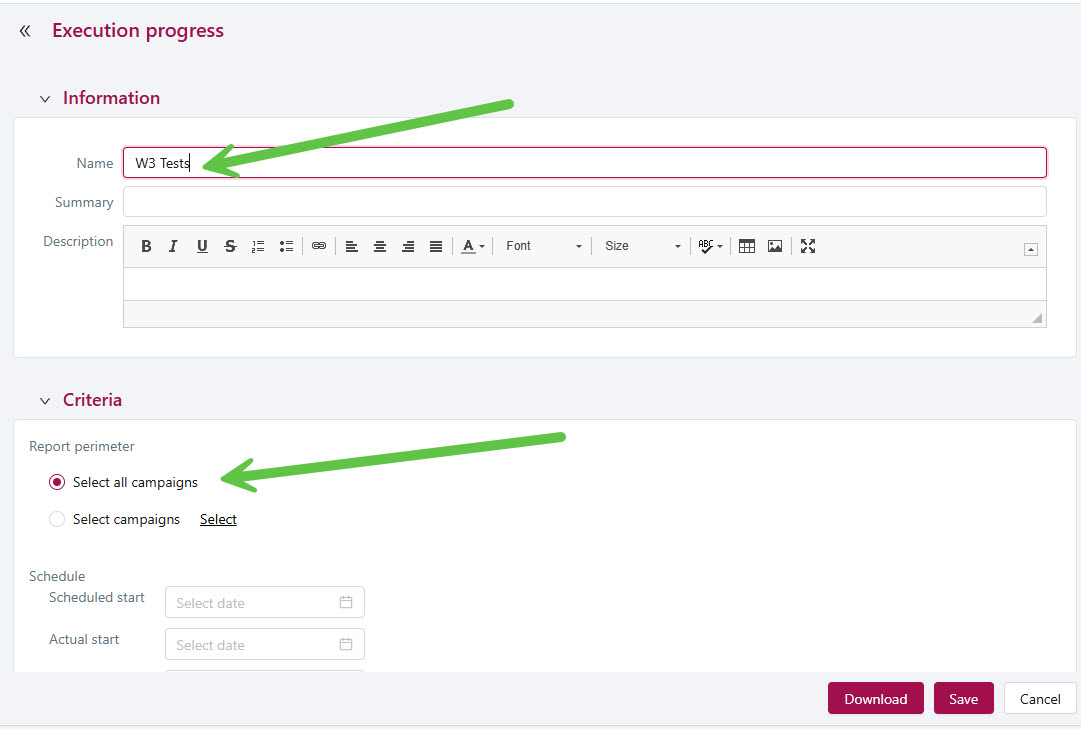
In the Name field enter an appropriate name to identify this report in the report list. Maybe something like W3 Tests
In the Criteria area's Report Perimeter select Select all campaigns.
Execution progress report settings
Click the Save button to save the report settings.
To run the report, ensure the report you wish to run is selected then click on the download icon
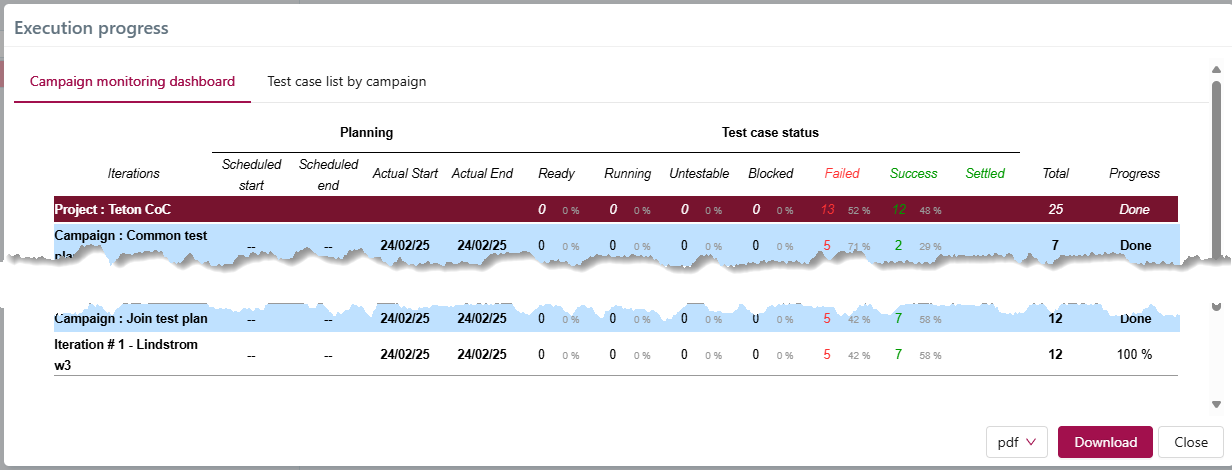
Campaign monitoring dashboard
There are two separate reports contained in the Execution progress report:
Campaign monitoring dashboard
Test case list by campaign
You can download the reports in several formats, for these reports choose pdf, then select the download button. Save the report with your name appended to the front of the filename.
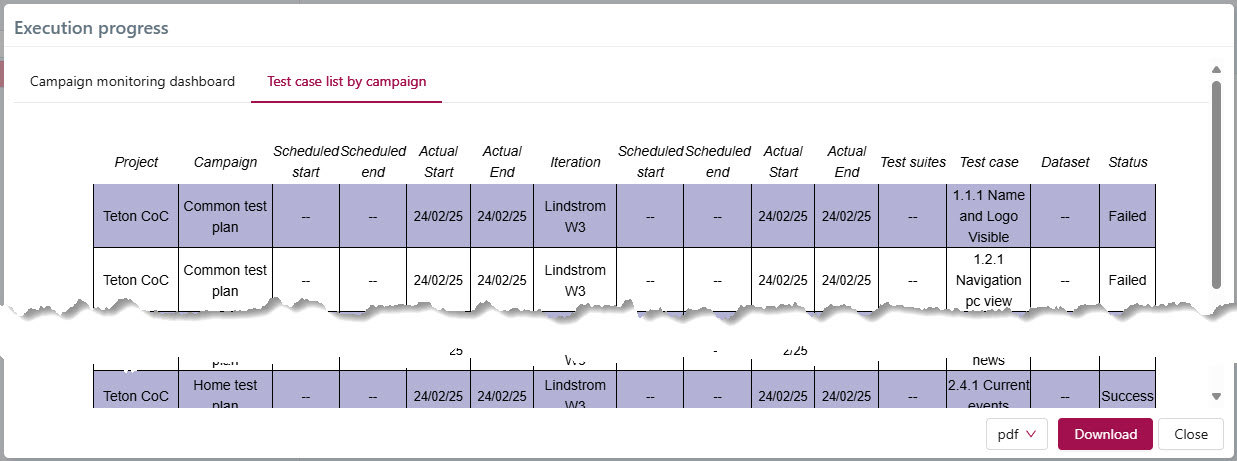
Select the Test case list by campaign link at the top of the window, to view that report.
Test case list by campaign report
Select pdf as the report type, then click the Download button to download the report.
 icon, then select Add an iteration from the add menu.
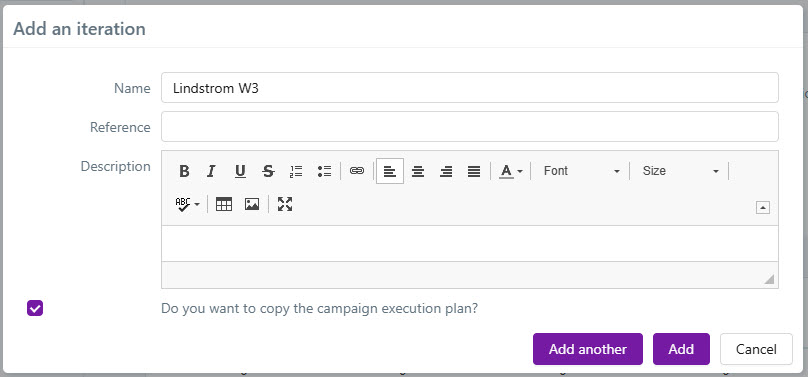
 Dashboard: Summary view of test iteration.
 Information: Test details.
 Planning: Start and end test dates.
 Statistics: Detailed test result statistics.
 Execution plan: Detailed execution steps.
 Automation suits: Test automation utilities (we will not use this feature)
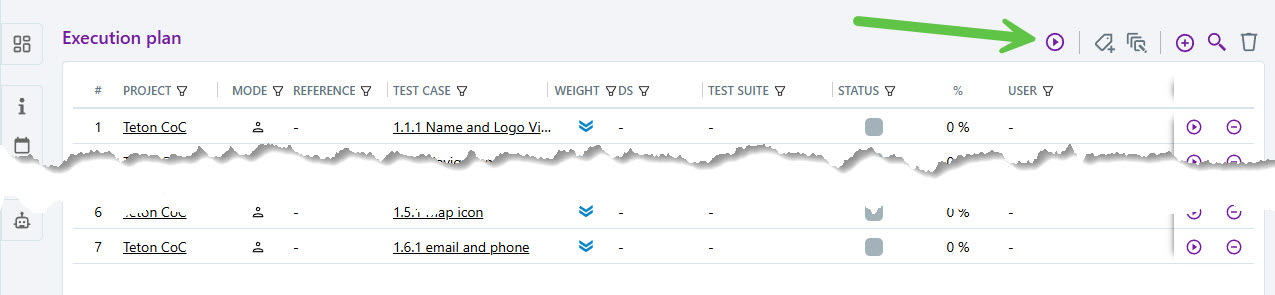
 icon to start this test case.
 status buttons at the top of the screen. The test will automatically advance to the next step, or next test case if that was the last step for the current test case.
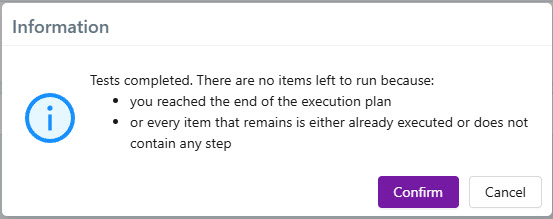
 plus icon to show the reports menu.
 download icon