W01 Activity: Team Project Setup
Overview
This activity is the setup and start of the team project. You will not be required to meet synchronously this week with your team but it is highly encouraged that you attempt to do so.
Normally, you will designate one team member as the "main driver" and collaborate on the driver's copy of the code during synchronous meetings for Team Activities. The driver should be the only one entering code, the rest of the team directs the driver and help to complete steps including writing code.
Activity Instructions
Project Setup – Trello Board
Only one member of your team needs to complete Steps 1 and 2.
Your team will have one official project Trello board and repository.
Do not complete the this activity until you have communicated with at least one member of your team.
- Login to your Trello account.
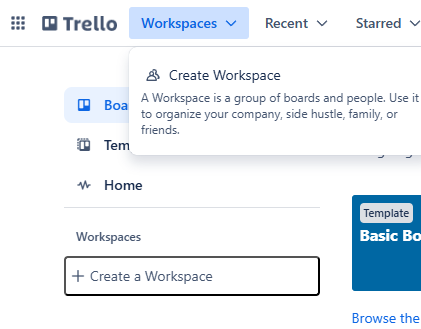
- Create a workspace named "WDD 330" or something similar.
Help: Screenshots

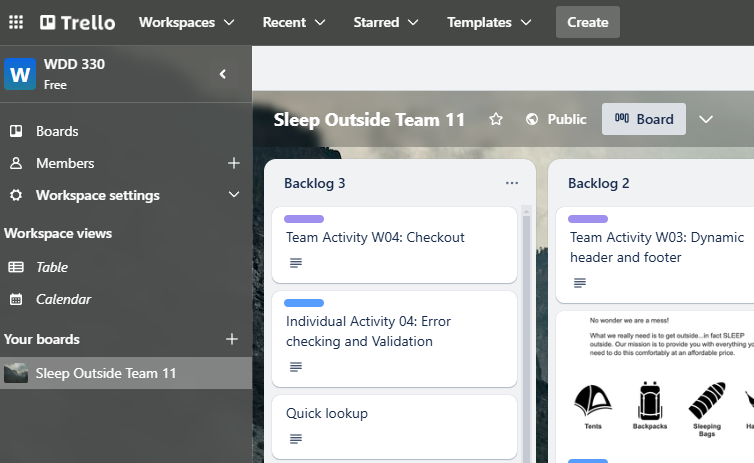
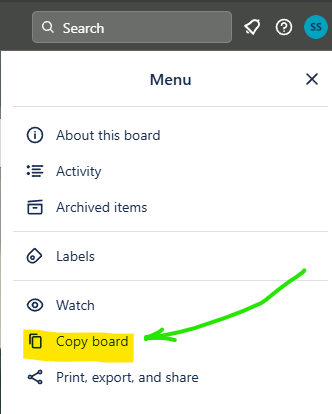
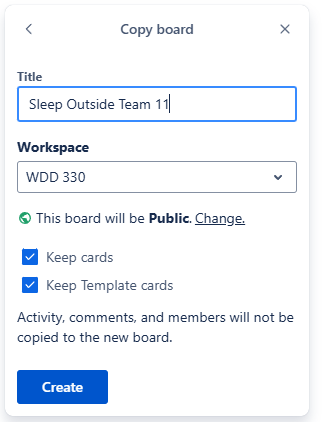
- Copy this Sleep Outside Trello board to your
account.
Help: Screenshots
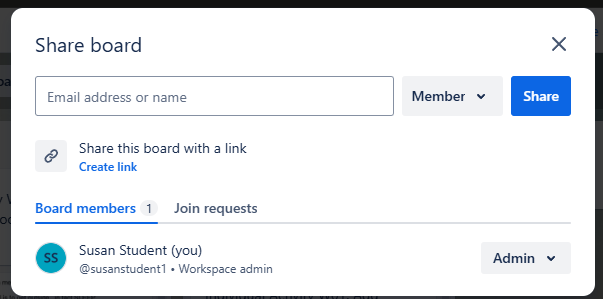
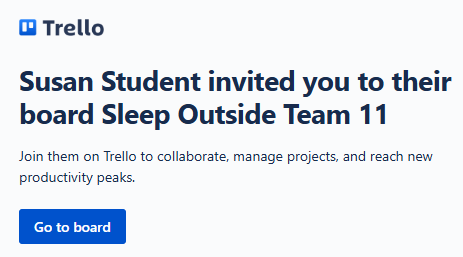
- Invite the other team members to the board using their Trello account emails.
Remember to continue to add members as they join the team.
Help: Screenshots
- Set the board to Public if needed.
Help: Screenshot

- On trello.com, add each team member to the
Team Activity W01: Setup project for all team memberstask.Add members to this task as they join the team.
- Move the task to
Doingcolumn. This is the task associated with this team activity.
Link: ▶️ Basic Trello Board Operations – [ 3:43 minutes ]
Project Setup – Clone Repository
- Log into GitHub and clone this starting Sleep Outside Repository Template by clicking the "Use this template" button to create a copy of the project into a new repository and give the new repo a name.
- Go to the cloned repositories
Settings > Manage Accessand add the rest of the team members as collaborators.
Clone and Build the Project
- Everyone else on the team needs to clone this team repository to their own computer.
- In VS Code, open the directory that contains the cloned repository.
- Open a terminal window and switch to the project directory.
Open the terminal in VS Code by pressing
ctrl+~to toggle the terminal panel open and closed.In VS Code, you can use the terminal panel (
ctrl+~toggles the terminal panel open and closed). When you open the terminal in VS Code it will automatically be set to the root of your project. - Run the command line interface list (
ls) or directory (dir) command to list all the contents of the current directory/folder. Make sure that you see package.json in the list of files. Change to the proper, project clone directory if you do not see this file. - Run the node package manager installation routine using the terminal.
>npm install 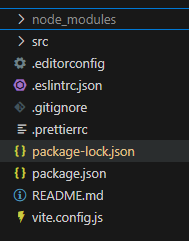 Notice that a new directory was created:
node_modules- This project comes with several tools built in to help the team to write error free
consistent code.
Open up the package.json file. There are two sections to review initially,devDependenciesandscripts.devDependenciescontains all of the tools needed for development of this project. Runningnpm installreferred to this list to know what to install.scriptsare shortcuts to project management commands. It contains the following"scripts": { "start": "vite", "build": "vite build --emptyOutDir", "lint": "eslint *.js src/**/*.js", "format": "prettier --ignore-path ./.gitignore --write \"./**/*.{html,json,js,ts,css}\"", "test": "jest" },- start: This will run the development server. You will use this the most.
- build: This will prepare the code to be deployed to production. One person in your team should be designated to run this as needed.
- lint: This will run Eslint against the code to look for style and syntax errors. You should do this each time you are ready to commit. Make sure to clean up any errors it finds before you commit!
- format: This will run Prettier on your code and format it all consistently. You should also do this as a step in your commit process.
- test: This will run the Jest testing framework on your code.
The commands are run in the terminal. If you wanted to start up the development server, for example, you would type
npm run startin the terminal. If you wanted to run the linter, you would typenpm run lint.
- Try running the linter now.
What did you see? Open up the>npm run lint.eslintrc.jsonfile. You may have noticed that one of the errors it is complaining about is that your quotes should all be single.Do the quotes need to be single quotes? Does it matter? It actually does not matter whether you use single or double quotes in your JavaScript code. However, it is important to be consistent. Your team will need to agree on a standard and stick to it. This is why the linter is used to enforce a standard. It will help you to avoid errors and make your code more readable.
- Decide as a team whether you would like to use single or double quotes. Then find the line
that looks like this:
"quotes":["error", "single"]in the .eslintrc.json file. If you want single quotes then make no changes. If you want double quotes then change the word"single"to"double".The
eslintrc.jsonfile belongs to the team. If your team disagrees with any of the rules that are being enforced, change them. Just make sure that all the team members agree with the changes. If you do decide to dig into setting up custom Eslint rules you might want to get the LintLens extension for VSCode. - Run the following command:
Then go and run the linter again. What happened? Have someone fix any remaining errors, then commit and push the changes.>npm run formatEach member of the team should run the format and lint command before they commit after making any changes throughout the course.
- Run the following command:
This runs command runs several processes on the code and launches a web server at>npm run startlocalhost:xxxxwherexxxxis some port number. It should also open that address in your default browser as well, if it did not you can type that address directly into a browser or click on the link in the terminal.You should use this server as you develop your project instead of something like Live/Five Server.
- When you are done working you can stop the dev server by typing
ctrl cin the same terminal window in which the process is running. That will terminate it.
Publishing

- Build the distribution using the following command:
This will create a directory called dist.npm run build - One person only will need to commit those changes and push them to GitHub.
- View the repository at github.com and notice that the dist directory did not transfer with the commit. If you check the .gitignore file that is part of the project, you will see why.
- You will be using a platform called Render to host the
live web application site.
✔ Create a free account on render using their GitHub credentials and login for the next step. - After logging in you need to add a new Static Site. Click on the "+ New" button at the top and select GitHub.
- Select the repo that contains the sleepoutside project.
- Select the "main" branch and confirm these settings before you deploy:
- Build Command:
npm install && npm run build - Publish Directory:
dist
This is the link to your "production" site.✔ The build version of the site will be considered the production version. This app site should always be working. Render will update your site every time it sees a change to the "main" GitHub branch. So after pull requests are reviewed and merged you should probably go to the Render URL to make sure nothing broke.
- Build Command:
Merge Conflicts
- Pull changes down from GitHub.
- If it does not exist yet, create a file in the root of the project called
team.txt. - Make sure there is a link to the team Trello board in the text file.
- Add your name to the text file.
- Then commit that change, and push it up to GitHub.
- What happened? This should have resulted in an error with Git if more than one person has
edited, committed, and pushed the file.
There were multiple changes made to the same file and Git doesn't know which to keep. This results in a merge conflict. How can conflicts be avoided? A couple of ways:
- First, make sure whenever you sit down to work on the project you should pull before you do anything else to make sure you get changes any of your teammates have made recently.
- Commit often! Small commits are less likely to result in conflicts than large ones...and they are much easier to fix if a conflict does occur.
- Take advantage of software design techniques like modules to break your code up into smaller pieces.
- Finally take advantage of Git's ability to branch. Branching is introduced in this activity's stretch activity below.
- Before you can commit the merge conflict will need to be resolved. Make
sure that the team.txt file is open. You should see some additions to the file from Git. It
should look something like
below.
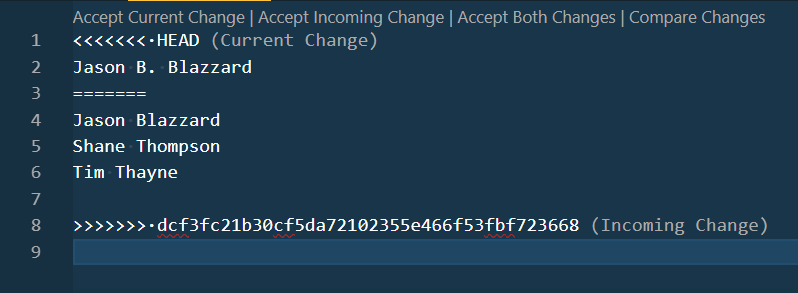
You must decide which code should be kept.
- The code content under the
<<<<<<<•HEADis the code you were just trying to send up. - The code content under the
=======is the code that was already in GitHub. - If you want to keep the code you were just writing, and throw the other away you could choose "Accept Current Change".
- If you wanted to keep what was on GitHub and remove your recent changes choose "Accept Incoming Changes".
- Or, if you choose "Accept Both Changes" it will merge both sets of changes together. This is often the quickest way to get rid of the conflict, but is usually requires more work to actually fix the problem.
- In this case, accept both, then delete the name without the initial. That would leave us with the most current versions of everything.
- The code content under the
- Once you fix the code you will need to commit the merge.
- Push your changes to GitHub.
This was a simple merge as it was easy to see what needed to stay. Imagine if the file was 200-300 lines long, and two team members had made edits in 10-15 lines of code scattered across the file and caused a merge conflict. It would have been far harder to figure out what to keep. The lesson is to keep your commits small.
Stretch Activity
One of the most powerful features of Git is the ability to branch code. Branching makes a copy of the project code at the current point in time that changes are made without affecting any other branch. This allows an organization to always keep a fully working production version of the application code that can be deployed at any time while also working on updates which updates may normally cause a disruption in the application service.
You can also use branches to reduce merge conflicts if multiple team members need to make changes to the same file in a codebase.
Branching Practice Instructions
- Create a new branch. Name your branch something like
yourinitials--branch-test. - Add a file in the root of the project called yourname.txt.
- Type your name in the text file and save it.
- Commit and publish (push) your branch to GitHub.
- Complete a pull request after the other members of the team have all pushed their own branches.
- Switch to one of the new branches in the repository. Notice what happens to the listing of files in your editor when you do.
- Switch back to your own branch.
- Switch back to the main branch.
- Discuss with your team what you saw.
Throughout the semester you will be fixing bugs and adding features to the SleepOutside
project. When you assign a task to yourself, create a new branch to contain the work you will
do. Name the branch initials--feature-name. Then, when you are done with your
work and you are confident everything is working, submit a pull request.
Pull Requests
When you are done with the feature that you created a branch for, the new code should be merged back into the main branch. This can be done in two ways:
- directly merging the working branch back into the main branch, or
- run a pull request.
On projects where there is only one developer, merging directly works. However, when working with a team, it is more common to work through pull requests. A pull request essentially means "My work is done and tested, I am ready for the code to be merged in with the main branch. Can someone check it out and make sure you don't see any issues. (So I don't break anything 😁)"
In this case right now, the branches do not contain anything important that needs to be merged back into the main branch. So most of them can just be deleted.
- Have one person on the team, who is not the driver, submit a pull request for their own branch to observe what the process is like.
- After the pull request has been made, the driver should go to the repository in GitHub and review the request and then finish the merge.
- Make sure that any extra branches are deleted once the merging has been completed.
- Move the Team Activity W01 card in Trello to "Done".
Example Solution
There are no instructor solutions for this activity.
Submission
Return to Canvas to report on your activity work and contributions.