W02 Learning Activity: The Fetch API
Overview
Often a web site or application will need to get information from another website or service such as weather data, the latest news, or user data, or even an image. The Fetch API in JavaScript is like your web page's personal delivery service to make those requests.
Prepare
Fetch is a promise-based API that allows you to make network requests. The Fetch API is built into most modern
browsers. The fetch() method takes one mandatory argument, the URL of the resource you want to fetch.
This is
often called the "endpoint". It can also take an optional second argument, which is an object that contains any
custom settings you want to apply to the request such as the method (POST, GET, DELETE), headers, credentials and
more.
Most web services required authentication credentials to make requests.
For example, the following code uses the fetch() method to make a GET request to an example URL at
'https://jsonplaceholder.typicode.com/todos/'.
jsonplaceholder.typicode.com is a test API that returns fake data for testing purposes. It along with many other free services are used to practice making requests and working with data.
const response = await fetch('https://jsonplaceholder.typicode.com/todos/');In this example, the fetch() method returns a promise when attempting to call with the URL of the
resource we want to fetch. The await keyword is used to wait for the promise to resolve before
continuing with the code. This is important because the fetch() method is asynchronous, meaning that
it does not
block the execution of the code while it waits for the response. The means that this code will need to be inside
an
async function. The await keyword can only be used inside an async as shown
in the next example.
You can then use the .json() method on the response object to parse the JSON data and use it in your
application.
The .json() method also returns a promise, so you can use the await keyword to wait for
the data to
be parsed before using it.
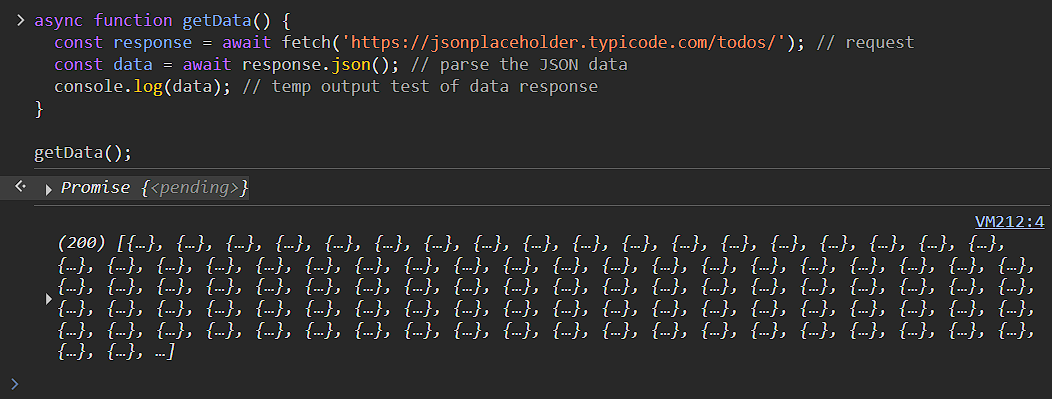
async function getData() {
  const response = await fetch('https://jsonplaceholder.typicode.com/todos/'); // request
  const data = await response.json(); // parse the JSON data
  console.log(data); // temp output test of data response
}

getData();
Copy and paste the code above into the browser's DevTools console and run it. The response will be an array of 200 objects. After you run the code, expand the array in the console to view the individual objects.
This data can now be used in your application. You can loop through the array and display the data in your HTML
using JavaScript. The fetch() method is a powerful tool for making network requests and working with
data in your web sites and applications.
Activity Instructions
In this activity you will use the modern Fetch API to make an asynchronous request for prophet data that is stored in JSON format and then you will create a page of content dynamically using that data.
Work with your group as you run into issues or have questions with learning activities. You should be receiving notifications of posts made in your group's Microsoft Teams channel.
Setup
- In your wdd231 folder, create a new file named "prophets.html".
- Add a file named "prophets.css" and a file name "prophets.js" into their appropriate folders.
HTML
- In the prophets.html file, structure the page using valid html and meta information.
- Link the stylesheet to your page.
- Reference the script using
defer. - Add the following HTML to your
<body>element.<header> <h1>Latter-day Prophets</h1> </header> <main> <div id="cards"></div> </main> <footer> [Enter Your Name Here] | Latter-day Prophets </footer>
JavaScript
- Open this file in your browser to identify and reference the key/value pairs found in the JSON data. https://byui-cse.github.io/cse-ww-program/data/latter-day-prophets.json.
- Declare a const variable named "url" that contains the URL string of the JSON resource provided.
const url = 'https://byui-cse.github.io/cse-ww-program/data/latter-day-prophets.json'; - Declare a const variable name "cards" that selects the HTML div element
from the document with an id value of "cards".
const cards = document.querySelector('#cards'); - Create a async defined function named "getProphetData" to fetch data from the JSON source url using the await fetch() method.
- Store the response from the
fetch()method in a const variable named "response". - Convert the response to a JSON object using the .json method and store the results in a const variable named "data".
- Add a console.table() expression method to check the data response
at this point in the console window.
The console.table() method is a great way to view the data in a table format. You can also use the console.log() method to view the data in a more traditional format. The console.table() method is especially useful for viewing large amounts of data in a more organized way.
- Call the function getProphetData() in the main line of your .js code to test the fetch and
response.
Check Your Understanding – Example
async function getProphetData() { const response = await fetch(url); const data = await response.json(); console.table(data.prophets); // temporary testing of data response } getProphetData(); - If it all checks out, note that the data returns a single property, an array of objects named "prophets".
- Comment out the console line and call a function named "displayProphets"
and
include the "data.prophets" argument. Why do you send data.prophets
versus just the data variable? The displayProphets() function expects an array
parameter.
Check Your Understanding – Example
async function getProphetData(url) { const response = await fetch(url); const data = await response.json(); //console.table(data.prophets); displayProphets(data.prophets); // note that you reference the prophets array of the JSON data object, not just the object } getProphetData(); - Define a function expression named "displayProphets" that handles a single parameter named
"prophets" somewhere in your js file. Use an arrow expression to contain statements that will
process the parameter value and build a card for each
prophet.
const displayProphets = (prophets) => {
  // card build code goes here
}
Remember that functions are hoisted and therefore, where ever you define the function in your main line of code does not matter as it is available to the rest of the scoped code.
- Inside the function, use a
forEachloop with the array parameter to process each "prophet" record one at a time, creating a new card each time.const displayProphets = (prophets) => { prophets.forEach((prophet) => { // card build code goes here }); } - Inside the HTML card building loop, do the following:
- create a section element and store it in a variable named card using
createElement(), - create an h2 element and store it in a variable named "fullName",
- create an img element and store it in a variable named "portrait",
- populate the heading element with the prophet's full name using a template string to build the full name,
- build the image element by setting the
- src,
- alt,
- loading,
- width, and
- height attributes using setAttribute().
- Using
appendChild()on the section element named "card", add the heading and image elements one at a time. - Finally, add the section card to the "cards" div that was selected at the beginning of
the script file.
Check Your Understanding – Example (With blanks to fill in)
const displayProphets = (prophets) => {
  prophets.forEach((prophet) => {
    // Create elements to add to the div.cards element
    let card = document.createElement('section');
    let fullName = document.createElement('__'); // fill in the blank
    let portrait = document.createElement('img');

    // Build the h2 content out to show the prophet's full name
    fullName.textContent = `${prophet._____} ____________`; // fill in the blank
    // Build the image portrait by setting all the relevant attributes
    portrait.setAttribute('src', prophet.imageurl);
    portrait.setAttribute('alt', `Portrait of ${prophet.____} ______________`); // fill in the blank
    portrait.setAttribute('loading', 'lazy');
    portrait.setAttribute('width', '340');
    portrait.setAttribute('height', '440');

    // Append the section(card) with the created elements
    card.appendChild(_______); //fill in the blank
    card.appendChild(portrait);

    cards.appendChild(card);
  }); // end of arrow function and forEach loop
}
- create a section element and store it in a variable named card using
Test and Style and Share
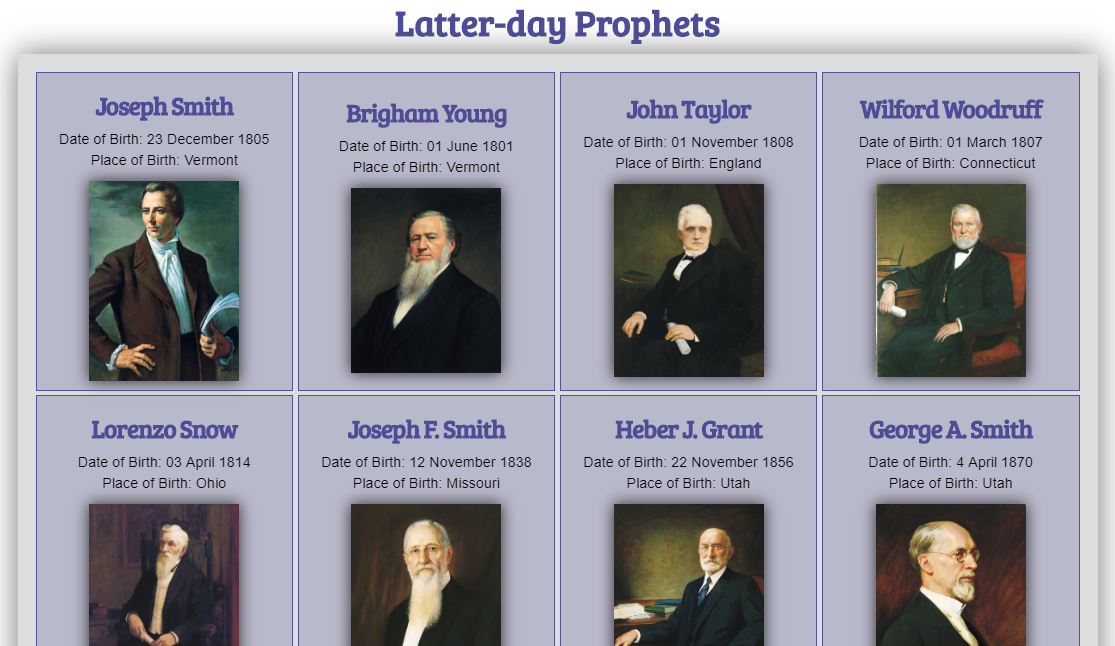
- Test the output and then add the remaining information as shown in the screenshot examples.
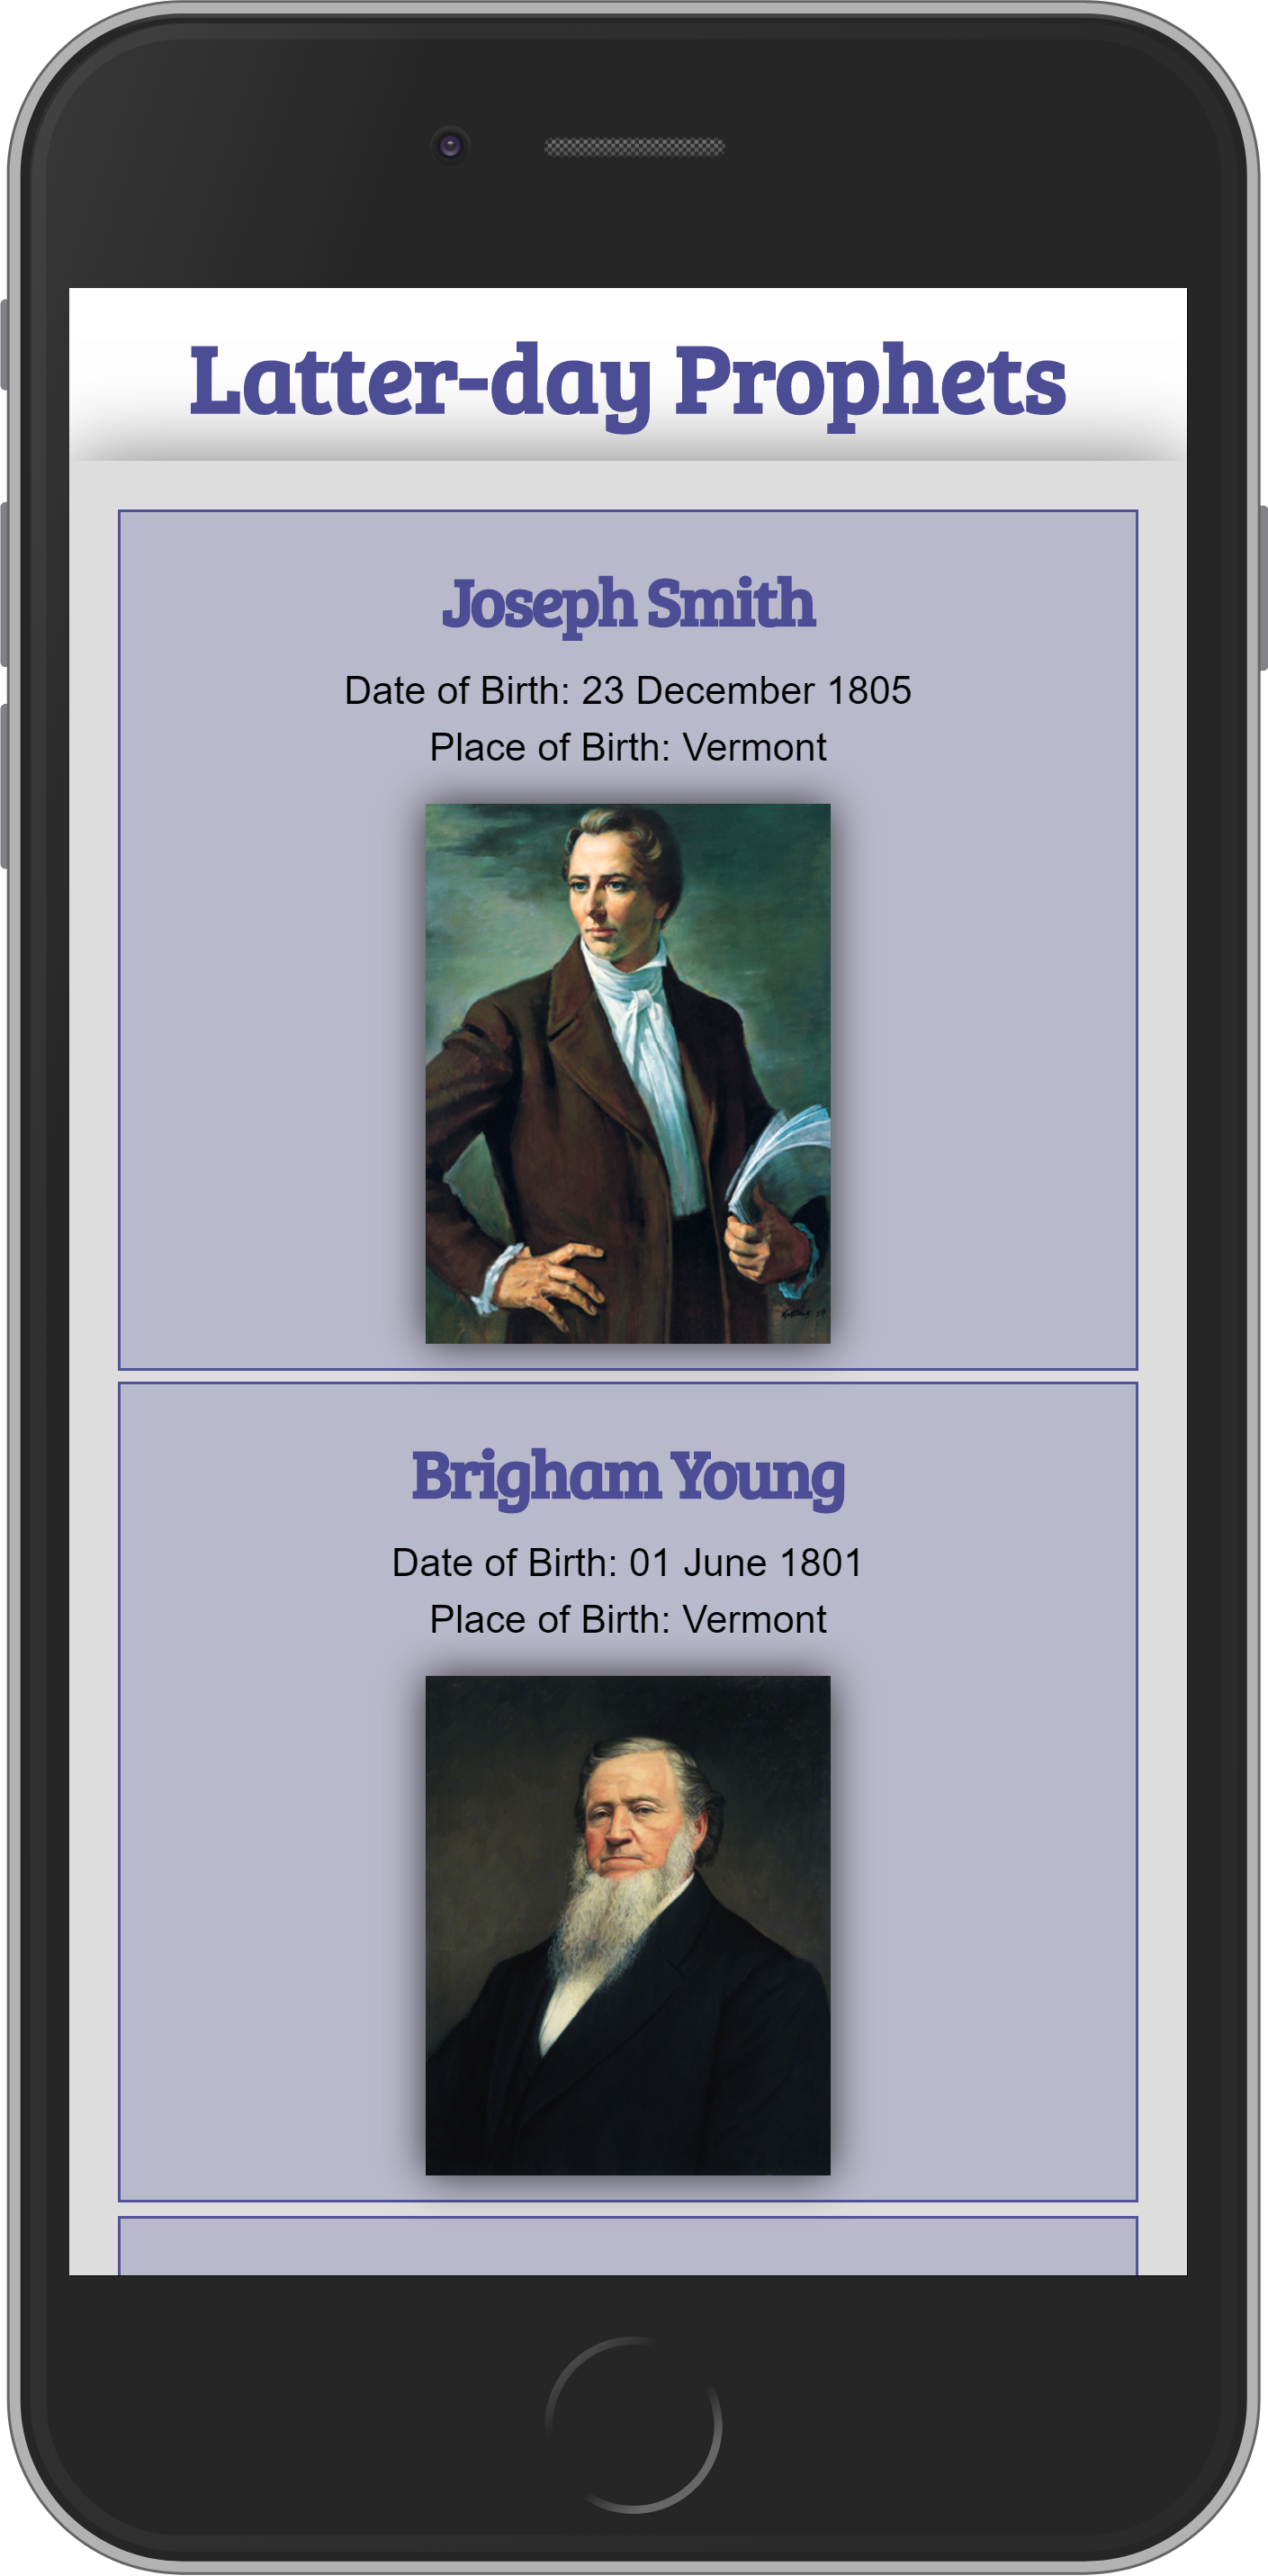
- Add page styling using the external CSS file by attempting to replicate, using your own colors and font choices, the layout shown in the example screenshots.
- Using a CSS Grid, use the
auto-fitvalue to ensure that the page is responsive.Code Example: CSS Auto Columns - No Media Queries Using CSS Grid and
auto-fit - Add the Date of Birth and Place of Birth as shown in the screenshot at the start of this activity.
- Share your work and issues with on Microsoft Teams.
Optional Resources
- fetch() – MDN
- Promise – MDN
- Responses – MDN
- Using the Fetch API – MDN