W01: Your Course Home Page
Normally you will work with your team synchronously each week on the Team Activity for at least one scheduled hour. This week, focus on signing up for a team and establishing your group and connecting with them. Asynchronously work with the course via MS Teams channel to meet this weeks requirements on building your course portal home page and submitting your own, published page for feedback and assessment.
Overview
This assignment demonstrates individual prerequisite knowledge and understanding by applying HTML and CSS design and development to a course portal, home page. In addition, you will be asked to apply JavaScript to dynamically date the page.
What you will build
The following link provides an example of what you will be building for this assignment: Example Screenshots
Instructions
File and Folder Setup
- In VS Code, open the wdd230 local repository folder.
- Create a new page in this root folder named "index.html".
This is your course home page. You will maintain this page throughout the course with updates and links to activities and assignments.
- Create new folders (directories) named "styles",
"scripts", and "images'.
These sub-folders, on the repository root directory, will contain the relevant, asset files.Note that the words directory and folder have essentially the same meaning. Directory is the more accurate term for file systems while "folder" 📂 refers to the graphical metaphor that is generally accepted because it is highly related to the term file in the organized world. - Add a CSS file named "base.css" to the "styles" directory. This is your main CSS file.
- Add another CSS file named "larger.css" to the "styles" directory. This file's CSS rules will be contained in a media query and therefore the declarations will only apply in the larger views.
- Add a JS file named "getDates.js" to the "scripts" directory.
HTML
- In the index.html document, include:
- the required document type definition,
- html tag with language attribute,
- the head tag, and
- the body tag.
- In the <head>, include the following:
Refer to the course development standards if you need to review any of these <head> elements.
- the meta charset attribute,
- the meta viewport element,
- the title element,
- the meta description element, and
- the meta author element.
- Set the title content to "[Student Name] - WDD 230 - Web Frontend
Development"Enter your own name in the [Student Name] placeholder.
- Phrase the meta description content to include these words:
- "WDD 230 - Web Frontend Development"
- Your full name
- "course assignment portal"
Use other, relevant keywords to create a clear description. - In the <body>, create a layout using header, nav, main, and footer elements in that order.
- Include four links in the navigation nav named
"Home", "Chamber", "Site Plan", and
"Form". Implement wayfinding for the home menu item.
The placeholder links will be replaced with links to other assigned pages later in the course.
- The <header> element contains your optimized profile image img and your name in an span tag.
- The <main> element contains the following:
- A h1 tag with the words "WDD 230: Web Frontend Development".
- A section tag with the class attribute named "card" that contains the following:
- An h2 tag containing "Learning Activities" as text.
- An ul with list items li and anchors a for learning activities that will be populated throughout the the course.
- A second section with a class name of "card" that contains the following:
- An h2 tag containing "Information" as text.
- Information placeholders about the weather, number of visits to the page, etc.
You do not need to program the weather or visits functionality at this point in the course.
- Demonstrate your understanding of Grid by using CSS Grid to lay out this section of the page.
- On small screens, the two cards are stacked
- On large screens, the two cards are displayed side by side
- On large screens, the Learning Activities card is twice as wide as the Information card
- The <footer> has two paragraphs p:
- The first paragraph contains the following:
- The copyright symbol and current year where the year will be dynamically populated using JavaScript code.
- Your name.
- Your state or country (Adding the flag is optional.)
- The second paragraph has an id of "lastModified" and will be populated with JavaScript code.
- The first paragraph contains the following:
CSS
Layout the page as shown in the given screenshot examples.
- In the base.css file, style the page with your own color schema and typography choices.
- Use the Google Fonts API to select one or two fonts to use on the page.
- In the larger.css file, encase all the CSS rules in a media
query using a min-width conditional breakpoint of your choosing.
Where to set the breakpoint between the mobile (base) and larger views should be based upon design. Work with the breakpoints until you are comfortable with the response.
- Use CSS Flex on the navigation.
- Display the navigation links vertically in a single column in the mobile view and horizontally in one row in the larger views.
- The main element has a limited width and is centered on the screen horizontally.
- Layout the main column cards using CSS Grid.
- Display the main sections in a single column in the mobile view and in two columns in the larger views as shown.
- Set the style type of the course links list to none (do not display bullets).
- Make additional CSS alterations as needed between the two views.
JavaScript
- In your index.html document, reference the "getDates.js" file at the end of the document, right before the closing </body> tag.
- getDates.js contains the script for dynamically outputting:
- the copyright year (the current year) in the footer's first paragraph, and
- the date the document was last modified in the second paragraph.
Use the lastModified property of the document object to get this date/time dynamically.
You do not need to alter thedocument.lastModifiednative format.
Testing
- Validate your HTML and CSS using the ⚙️ Web Developer Extension or equivalent tool.
- Test your page in the latest version of your browser in responsive mode using the Inspect
Device Toolbar (Dev Tools).
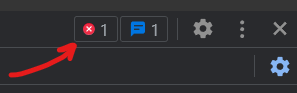
- Check for JavaScript runtime errors in the console or click the red, error icon in the upper right corner of Dev Tools.
- Use this ☑️ audit tool to self-check your work for some of the required HTML elements and CSS content.
- Use Dev Tools CSS Overview to check your color contrast.
- Generate the Dev Tools Lighthouse report and run diagnostics for
Performance, Accessibility, Best
Practices, and SEO in both the mobile and Desktop views.
It is best to test your page in a Private or Incognito browser window.
Submission
- Commit your local repository and push or upload your work to your GitHub Pages enabled repository on GitHub.
- Return to I-Learn and submit your home page URL.