W01 Assignment: Enabling GitHub Pages
Overview
You will be publishing your work to your own website which is freely served by the GitHub Pages service. Your peers, graders, and the instructor will then be able to access your site for collaboration and feedback. You have already established a GitHub account and installed git technology so that you can commit and push/upload your work to your GitHub repository. We will be doing that inside of VS Code.
Instructions
Publish the wdd130 folder to GitHub
- In VS Code, open your wdd130 folder if it is not already open.
The system may prompt you to trust the file source. Click Trust to continue.
- Select the Source Control icon in VS Code's Activity Bar.
By default, the Activity Bar is found on the left-hand side of the screen and will have up to five icons. If the Activity Bar is not visible, click View -> Appearance -> Activity Bar to turn it to visible.
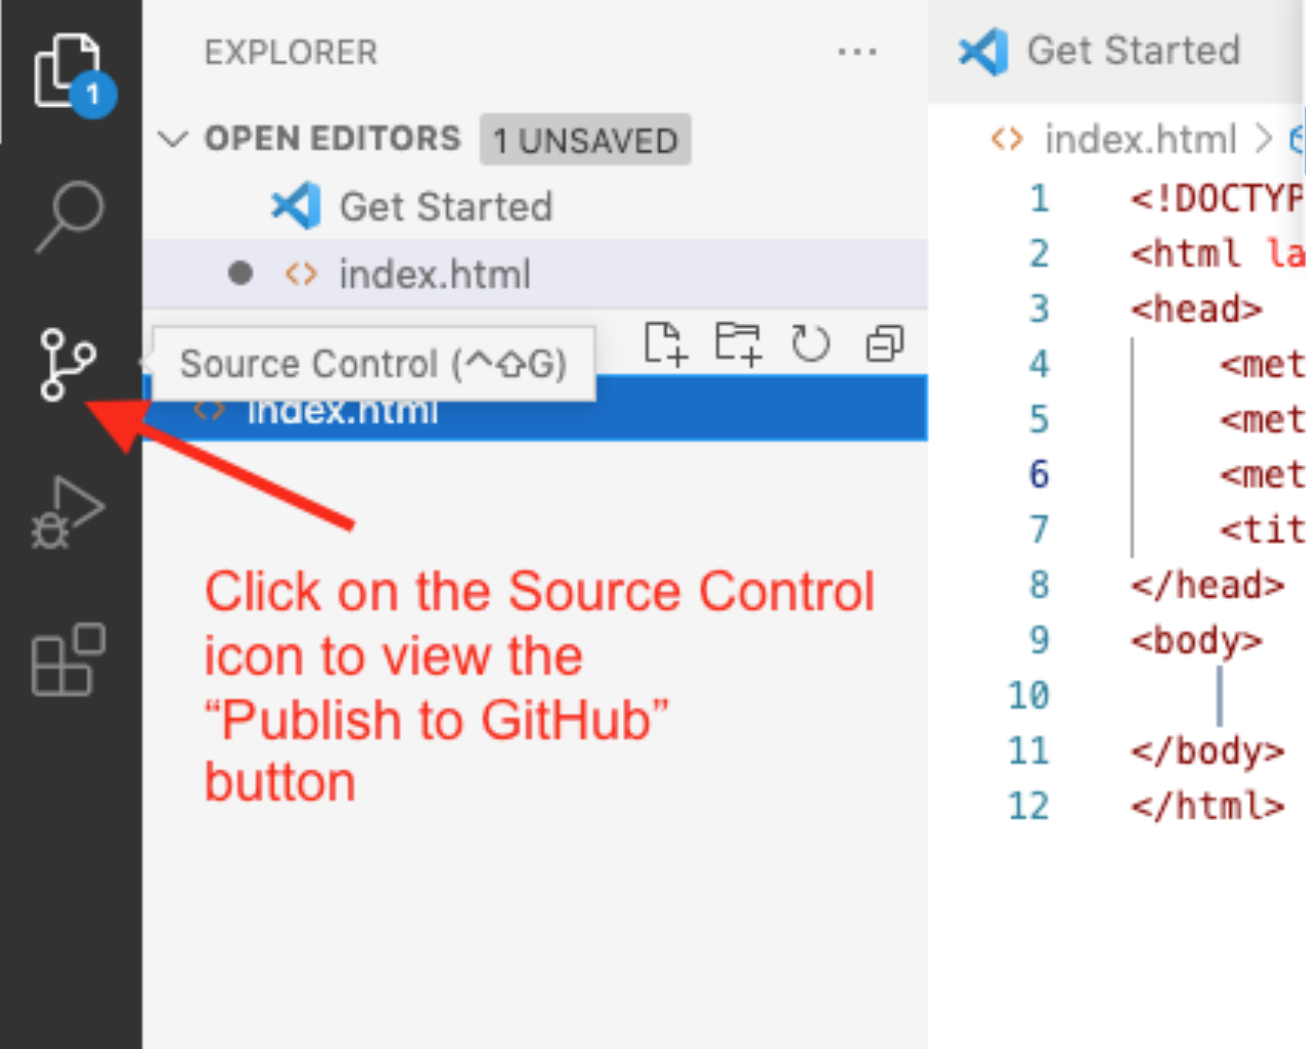
Source Control Icon in VS Code's Activity Bar - Click the blue button that says Publish to GitHub.

Publish to GitHub Button in the Source Control panel - Click Allow if you get a message saying something about allowing the system to use GitHub.
- Click Continue if you are prompted for an authorization for Visual Studio Code to Access GitHub.
- Click Allow if you are asked to allow the page to open Visual Studio Code.
- Click Open if you are asked to allow an extension to open this URL.
- A popup dialog box will appear at the top of VS Code.
Select "Publish to GitHub public repository".
Make sure to choose the public option.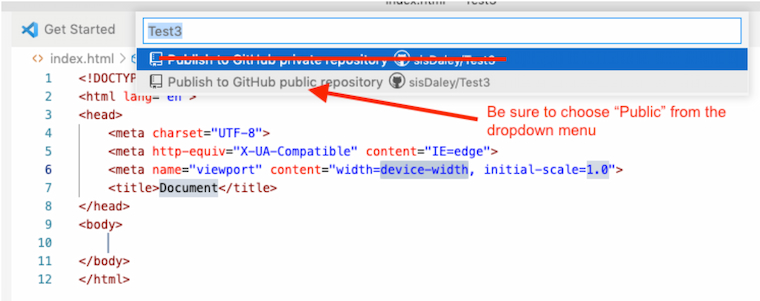
Publish to GitHub PUBLIC repository - A new popup dialog box will appear at the top of VS Code showing a list of the current folders and files in
the wdd130 folder. These folders and files will be selected by default so click
OK to include
the files.

Click OK to include all the existing folders and files - A new repository named
wdd130will be added to your GitHub account.Private repositories are not allowed for course work.
If you make a mistake and forget to select public, do not worry, you can change the repository's visibility later in Github by going to the repository's Settings and using Change visibility. - You may get a prompt to "Authorize Git Credential Manager". Click Authorize.
- If you get a message asking if you'd like to periodically run fetch you can say "Yes".
-
If you look at your GitHub account on github.com, a new repository named wdd130 will be
there along with any files or folders that were in your local wdd130 folder.
🎉 Your local
wdd130folder is now connected to a remotewdd130repository on your GitHub account.
Link: ▶️ Publish the wdd130 repository folder to GitHub – [ 4:18 minutes ]
If you have any issues with the publication process, please reach out to your instructor for help immediately. Publishing your wdd130 folder to GitHub is a critical step in the course because this repository is used for grading each week.
IF you need to, it is OK to delete a repository on GitHub and start over.
The Delete
Repository
option is found in the GitHub repository's Settings menu.
Link: ▶️ Delete a GitHub Repository – [ 0:27 minutes ]
Enable GitHub Pages
The free GitHub Pages service allows your web to be rendered in a browser as shown in the image below.
- Login to your GitHub account if needed.
- Open your wdd130 repository.
- Click ⚙️ Settings in the repository menu.
- Click Pages in the submenu that appears on the left of the settings panel.
- Under the Build and deployment section of GitHub Pages, in the Branch
section,
- select the main branch under the dropdown menu that says None.
- do not change the next dropdown menu with the default value of 📁 / root
- click Save
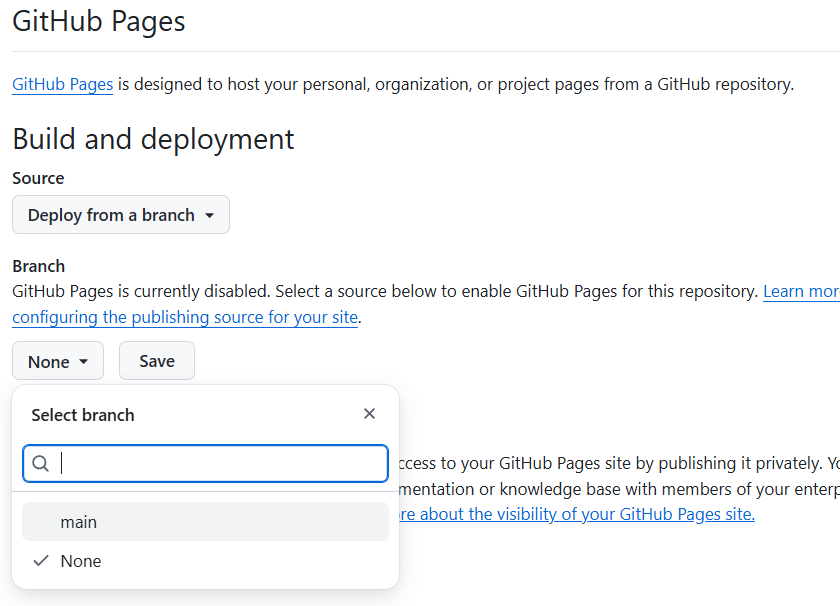
Select the main branch in GitHub Pages setup - 🎉 Your wdd130 repository is now enabled with GitHub Pages.
The URL for your course home page is https://username.github.io/wdd130.
username is your own GitHub account user name.
The site will take a few minutes before it actually renders the page.
Test and Share
- In your browser, navigate to your home page
(https://username.github.io/wdd130) and bookmark/favorite it in your
browser for easy access.
Any time you publish to GitHub, the updates will take a few minutes to render before the pages are available for viewing.
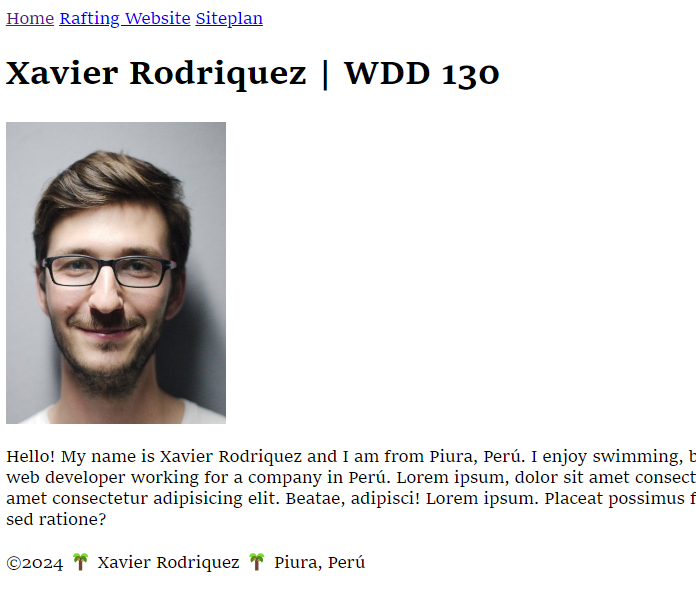
Example Student Course Home Page Rendered in the Browser - Self audit your page using this Week 01 Assignment: Student Home Page ✔ Page Evaluation tool.
- Share your GitHub Pages wdd130 URL with a family member, friend, or on Microsoft Teams with the class.
Link: ▶️ Enable GitHub Pages – [ 2:01 minutes ]
Submission
- After you have completed the work, return to Canvas to submit your GitHub Pages URL which will have the
following format:
https://username.github.io/wdd130/Remember to replace username in the example address above with your own GitHub account/user name.
- If you need to update or correct your page, you will have to commit and sync the changes to your wdd130 GitHub Pages enabled repository. The wdd130 is a linked repository that will keep track of those changes for you. You just need to go through the process of committing and syncing your changes, thus uploading your changes to GitHub.
Link: ▶️ Editing in VS Code and Publishing to GitHub – [ 3:15 minutes ]