![]()
Product Objective
In this lab, we will containerize our vehicle service application, enabling it to auto-scale and utilize a load balancer. By following these steps, you will learn how to configure Docker, create a container registry, and deploy containers using ECS and Fargate. This process will enhance the reliability and scalability of your application.
Add / Verify IAM Role
- Go to the EC2 dashboard
- Go to Instances
- Place a checkmark next to the instance that is running your app
- Choose
- IAM role choose
-
-
to the EC2
Install and Configure Docker to work with AWS
Install Docker
sudo dnf install -y docker
Add your AWS Credentials:
mkdir ~/.aws
cd ~/.aws
touch credentials
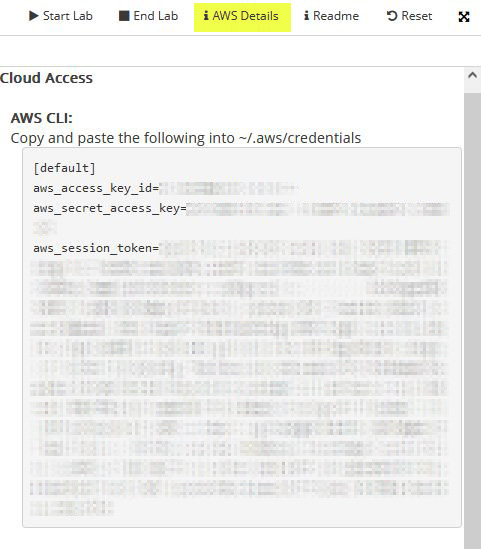
- Click on the tab where you opened the AWS Lab
- Click on i AWS Details
- Click on Show next to AWS CLI:
- Copy the contents of that box starting at the beginning of [default]. It should have the access key id, the secret access key and the token
- Go back to your EC2 connect tab
- Use Nano or Vim to paste the information into the file named credentials
Credentials
Please note that this file doesn't have an extension. It is just called credentials
aws configure
When you run this command it should read from the credentials file you just created. If the access key shows [None], you'll need to paste in the correct information from the ASW Details, otherwise you can accept the access key id and the secret access key by clicking enter twice. You'll need to enter us-east-1 for the default region name and json for the Default output format.
cd /var/www/html
We've created a basic Dockerfile for you. This file is called Dockerfile with no extension. Let's look at what is in the file:
cat Dockerfile
This will show you that we are using the latest version of nginx and that we'll copy all of the files from this folder into the /usr/share/nginx/html folder in the container. This will all happen when we create the container.
Start up docker:
sudo systemctl start docker
Add a docker group (this might fail, if it does just continue on to the next step)
sudo groupadd docker
Add your user to the docker group
sudo usermod -aG docker $USER
Log out
exit
Log back in by refreshing the page.
Make sure docker is listed in the groups the user is assigned
groups $USER
Verify your AWS CLI Authentication
aws sts get-caller-identity
You should get something like this in return:
We are going to switch to the root user to run the following commands
sudo su
Make sure we are in the correct folder
cd /var/www/html
Create the container registry
search Search for ECR which will bring up Elastic Container Registry. Open this in a new tab.
- Repository name: vehicle-app
- Click on vehicle-app
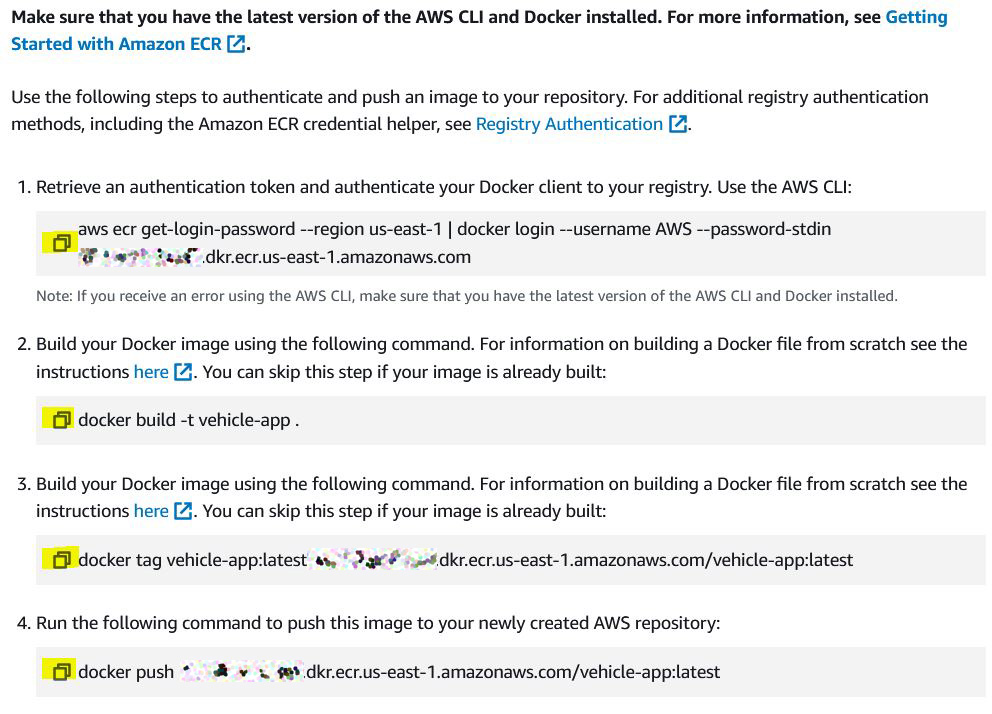
- Copy the 4 commands and run them in your EC2 terminal.
The commands should look something like this (don't use the commands below, COPY from the PUSH COMMANDS for your specific repository)
You should receive a response that shows the docker container was pushed to the ECR.
Exit out of the root user
exit
Go back to the ECR tab and click
- Click the button.
You should see 1 image with a tag of latest in the list.

Image URI
You'll need the Image URI for this image later in the lab.
Create an ECS
- search Search for ECS and open the Elastic Container Service in a new tab
Create a cluster
- Cluster name: VehicleCluster
- Use fargate
- Wait for the cluster to create
Cluster
Occassionally the learner lab will fail to build the cluster.
You can go to cloudformation and rerun the build.
If that fails, create a second cluster and call it VehicleCluster2 and use it instead.
Create a task definition
- Click on the left-hand column
- Click
- Task definition family: VehicleAppTask
- Launch Type: Fargate
- CPU: .25 vCPU
- Memory: 1 GB
- Task role: LabRole
- Task execution role: LabRole
Under Container-1
- Name: vehicle-container
- Image URI: paste in the URI from the ECR Image URI
Deploy the containers
- Exisiting cluster: VehicleCluster
- Under Deployment configuration
- Service Name: VehicleAppService
- Under Networking
- VPC: vehicleapp-vpc
- remove the private subnets
- Exisiting Security Group: Add vehicle-sg and remove the default one
- Under Load balancing
- Load balancer type: Application Load Balancer
- Load balancer name: VehicleLoadBalancer
- Under Service auto scaling
- Check Use service auto scaling
- Minimum number of tasks: 1
- Maximum number of tasks: 3
- Policy Name: Vehicle CPU usage
- ECS service metric: ECSServiceAverageCPUUtilization
- Target value 70 (these look like they already have values, you need to TYPE them in)
- Scale-out: 300
- Scale-in: 300
- Wait for the deployment to start
- Click the button under Services.
You will see 1/1 Tasks running
- Click on VehicleAppService
- Click on
Copy the DNS name for the load balancer and paste it into a new tab.
You will see your app running in a container on your load balancer. If we received enough traffic, the app would auto scale up to 3 containers for us.
Test the web app to make sure you can log in and see service requests.
Take a screenshot of your app running on the container with the load balancer address in the URL and submit your screenshot.
(OPTIONAL) Add SSL to your load balancer
From the Load Balancer page:
- Click Listeners and rules
- Click
- Choose HTTPS for protocol
- Target Group: ecs-Vehicle-VehicleAppService
-
Import certificate
-
Open your EC2 terminal
- Copy the contents of the file found here: /etc/pki/tls/private/apache-selfsigned.key
- NOTE: This file will require sudo to view or edit
- Copy everything from the first dash of -----BEGIN PRIVATE KEY----- to the ending dash of -----END PRIVATE KEY-----
- Paste it into Certificate private key
- Copy the contents of the file found here: /etc/pki/tls/certs/apache-selfsigned.crt
- Copy everything from the first dash of -----BEGIN CERTIFICATE----- to the ending dash of -----END CERTIFICATE-----
- Paste it into Certificate body
You can now go to your load balancer and add https in the front. You'll need to accept the security warning because it is still self-signed.
Once finished, you can destroy the following:
- Load Balancer
- ECS Cluster
- ECS Tasks
- ECS Services
- ECR vehicle-app repository
If you leave these running, especially the load balancer, you will use up your allocated funds quickly.
Summary:
- Configured IAM Role: Ensured that the EC2 instance running your application had the appropriate IAM role for accessing AWS services.
- Installed and Configured Docker: Set up Docker on the EC2 instance, added necessary AWS credentials, and prepared the environment for containerization.
- Created a Docker Image: Built a Docker image for the application, tagged it, and pushed it to AWS Elastic Container Registry (ECR).
- Set Up ECS Cluster: Created an ECS cluster using Fargate, which allows for serverless container management.
- Created and Deployed a Task Definition: Defined the task for running the container, specifying resource requirements and roles, then deployed it to the ECS cluster.
- Configured Auto-Scaling and Load Balancing: Set up an application load balancer and configured auto-scaling policies to manage container instances based on traffic.
- Verified Deployment: Ensured the application was running successfully in a container behind the load balancer.
Key Concepts:
- Docker: Docker is a platform that enables developers to package applications into containers. Containers are lightweight, standalone, and executable packages that include everything needed to run a piece of software, including the code, runtime, libraries, and dependencies.
- Elastic Container Registry (ECR): ECR is a fully managed Docker container registry that makes it easy to store, manage, and deploy Docker container images.
- Elastic Container Service (ECS) and Fargate: ECS is a fully managed container orchestration service that allows you to run and manage Docker containers on a cluster of EC2 instances or using Fargate, which is a serverless compute engine for containers.
- Load Balancer: An application load balancer distributes incoming application traffic across multiple targets, such as EC2 instances or containers, to ensure scalability and reliability.
- Auto-Scaling: Auto-scaling dynamically adjusts the number of running container instances based on traffic, ensuring that the application can handle varying loads efficiently.
Reflective Questions:
- How does containerizing your application with Docker improve its portability and consistency across different environments?
- What are the benefits of using ECS and Fargate for managing your containerized applications compared to running containers on self-managed EC2 instances?
- How does using a load balancer enhance the availability and reliability of your application?
- Why is it important to configure auto-scaling policies, and how do they contribute to the application's performance and cost management?