
PostgreSQL Add Data
Introduction
With the database tables created, it's now time to add some data. For now, you'll add data to the "classification" and "inventory" tables, leaving the "account" table empty. This will be done using two different methods, both should look somewhat familiar based on the processes used to create the database structures: type, tables and relationship.
Remember: When including table and field names in SQL code, the names must be identical to the table and field names that exist in the database. In addition, the data must be the correct type of data for the field in which it will be stored.
Video Demonstration
The video provides a general overview of the activity, but does not contain the detail needed to complete each process. Watch the video to obtain a general idea, but follow the written steps to complete the activity. This is the Transcript of the video.
Connect to the Remote Server
- Launch pgAdmin and enter the master password.
- Expand the Servers list (if needed)
- Right-click on the Render connection
- Select "Connect to Server"
Classification Table Data
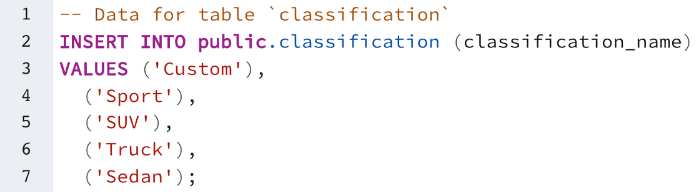
The "classification" table contains only two fields: classification_name and classification_id. The classification_id is set up to start with a value of "1" for the first record and add "1" to the value for each additional record. This means, you should not have to include it when adding data. The only value you should have to include is the value for "classification_name". As you did previously, use pgAdmin as the tool to interact with the database on Render.com.
- Expand each of the "Databases" items as needed until the three table names are visible.
- Right-click on the "classification" table, select "Query Tool".
- A new work window will open.
- Type the SQL code shown below into the query window.
- Double check that the code is correct and no pgAdmin warnings or errors are shown.
- Copy the code and paste it at the bottom of the VSC SQL file, where the table creation SQL code is stored. Save the file when done.
- Return to the pgAdmin tool.
- Click the "Execute / Refresh" button.
- Close the query window and don't save any changes.
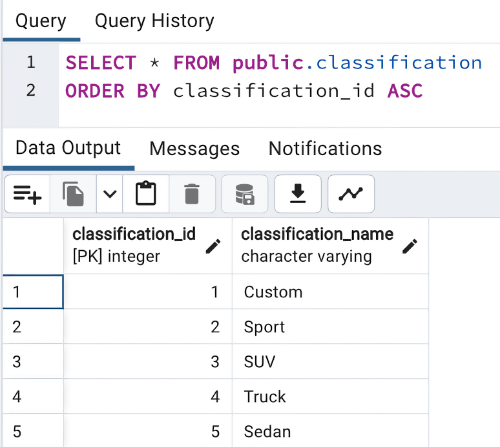
- To check that the query worked correctly:
- Right-click the "classification" table.
- Select "View/Edit Data > All Rows" from the options list.
- A new query screen will open with a SELECT query in the top frame and the data from the insert code
appearing in the lower frame.
- Assuming that everything worked, you're done with inputing the data to the classification table. You can close the query windows without saving.
- If errors occurred or things didn't work as expected, review the steps and your code to find and fix errors. Talk to your learning team, the TA or the professor. Get help until it works.
Inventory Table Data
Finally, you'll add the inventory table data. Because that is a lot of data, you'll not type the SQL query. Instead, you'll download a file containing the code, copy and paste the queries, then run them.
- Right-click the inventory-data, and select "Save Link As...", and save it into the database folder of the working project.
- Open the file in VSC.
- Select all the code from the file and copy it.
- Open pgAdmin (if it is not already open) and login (if needed).
- It is assumed that the connection between pgAdmin and the remote database is active and that the server items are expanded.
- Right-click on the "inventory" table, select "Query Tool".
- A new work window will open where SQL code is expected to be entered.
- Paste the inventory insert SQL code into the query window.
- Double check that there are no errors or warnings being indicated by pgAdmin.
- Click the "Execute / Refresh" icon in pgAdmin.

- The code should run and data should be inserted into the "inventory" table.
- Review the data by right-clicking the "inventory" table and select "View/Edit Data > All Rows".
- Copy the code from the text file again (if needed) and paste it into the VSC SQL file that holds the code from earlier. Ensure that the inventory inserts are at the very bottom of the page (again, order matters). Save and close the file when done.
Conclusion
Okay, let's take a minute and review. The database is built and two of the three tables (classification and inventory) have data. You should have noticed that in both insert processes, the primary key field populated itself, and in sequential order.
Furthermore, you have saved all the code into a SQL file, so the entire structure and data of the type and tables can be easily rebuilt. By storing all the creation code in a VSC SQL file, and in the right order, all you'll have to do is run the entire file's code at the same time and everything will be done in a single step. Woohoo!
Close the Connection
As stated in previous activities, it is recommended that when you are done with your interaction between pgAdmin and the database server that the connection be closed. To do so:
- Right-click on the Render server object in the "Servers" panel of pgAdmin.
- Select "Disconnect from Server".
- You're done.