W06 Assignment: Automated User Interface Testing
Overview
This exercise will be using the Selenium IDE browser plug in to create automated user interface tests.
Recall the manual testing we did in previous weeks on the Teton Idaho Chamber of Commerce web site. Using a tool like Selenium IDE, we can record ourselves visiting the web site and testing the site automatically.
A smoke test is used to verify the key features of a program are still up and running. This can be very useful for detecting breaking changes in a software deployment, or to detect when a subsystem is down and preventing proper functioning of the program. A smoke test is meant to be a quick check of systems that doesn't go very deep. We can create a smoke test for our site by verifying key features.
Instructions
Install Selenium IDE
First, install the Selenium IDE extension from the Firefox Extension manager onto your Firefox browser. The Selenium IDE extension has been disabled in Chrome.
- Open the Firefox web browser
-
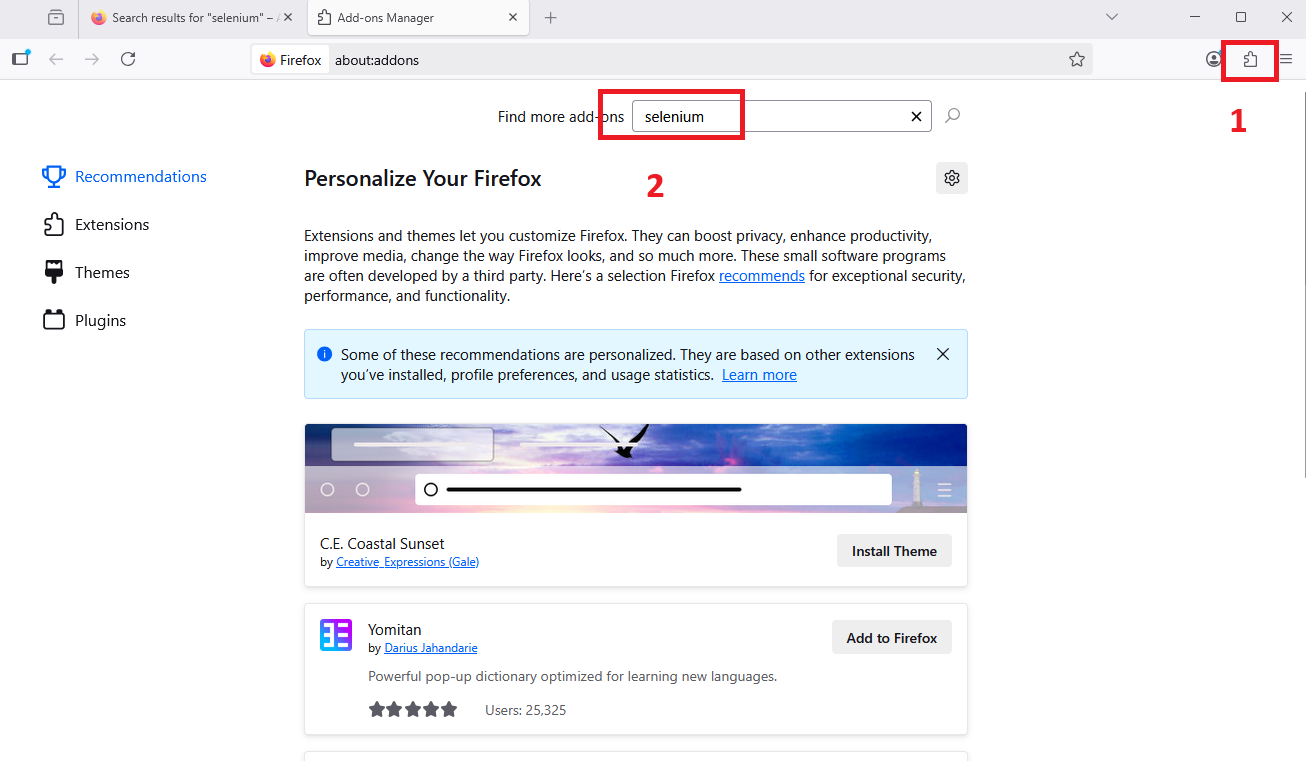
Click on the puzzle piece icon in the upper right corner of the browser to open the Extensions menu (1) OR click on the hamburburger menu and select "Extensions and themes".

Add extension in Firefox -
In the "Find more add-ons" search box type Selenium (2) and press "Enter" or click on the magnifying glass icon to find the Selenium IDE.
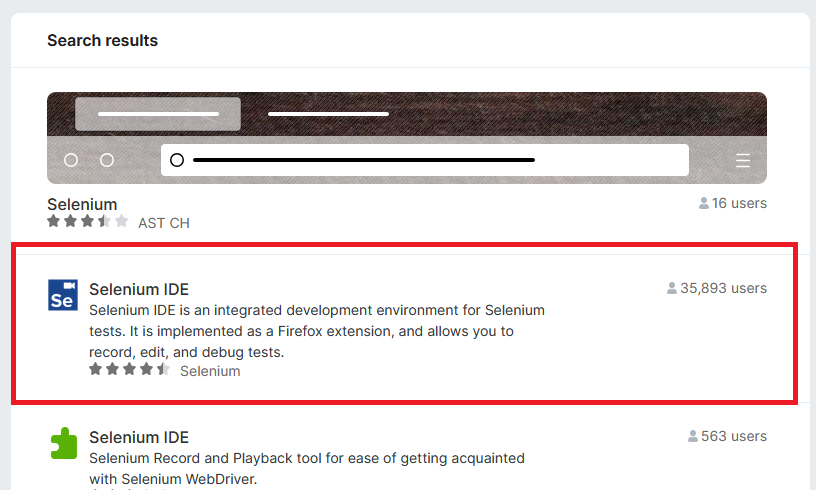
It will look like this:

Selenium IDE Extension - Click on the search result and then click the Add to Firefox button to add the extension to chrome.
Setup the Test Site
For these tests, you will use the v1.6 version of the site running locally on your computer. This is so we can create tests that will also run in our CI/CD pipeline. You should download and install the v1.6 version from this file cse270-v16.zip as you have done before.
Selenium Quickstart Tutorial.
To get you started, I will show you how to create a test case using Selenium IDE. We'll work on the first item in the list below.
Now it's your turn. Start by creating a new project called "Smoke Test". Save the file as smoke.side.
In the smoke project, create a suite of tests that do the following. Each item in the list should be in its own test:
-
Navigate to the home page
- Verify that the site logo is displayed
- Verify that the website heading "Teton Idaho Chamber of Commerce" is displayed
- Verify that the title displayed in the browser tab is "Teton Idaho CoC"
-
Navigate to the home page
- Make sure the screen size is big enough to show the full navigation menu
- Verify that two spotlights are present.
- Verify the Join Us link is present
- Verify clicking the Join Us link takes you to the join page.
-
Navigate to the directory page
- Click on the "Grid" button to display the card view
- Make sure that the "Teton Turf and Tree" business is shown in the cards
- Click on the "List" button to display the list view
- Again, make sure that the "Teton Turf and Tree" business is displayed in the list
-
Navigate to the join page
- Make sure the "First Name" input box is present
- Fill in the first page with information of your choosing
- Click the "Next Step" button
- Make sure the "Email" input box is present
-
Navigate to the admin page
- Make sure the "Username" input box is present
- Fill in an incorrect username and password
- Click the Login button
- Ensure the appropriate error message is displayed.
Be sure to save your project file and name it smoke.side.
Prepare for automation
This activity will require the selenium and pytest (should already be installed) python libraries. Install them now.
- In VS Code, open a terminal
-
On Windows type:
pip install selenium pytest -
On MacOS type
pip3 install selenium pytest
Create a Selenium Test Automation
-
Watch the video below for instructions on how to create automated Selenium tests.
- Using the instructions shown, export the smoke test you created earlier in this assignment
-
Update the test as instructed to run in headless mode by replacing the current setup_method function with this
new one below.
def setup_method(self, method): options = Options() options.add_argument("--headless=new") self.driver = webdriver.Chrome(options=options) self.vars = {} -
Add the following import to the imports section
from selenium.webdriver.chrome.options import Options -
After updating the file, do a test run on your local machine
- Start your local Live Server and observe which port it runs on.
- Open a terminal window
- type "cd tests" and press Return or Enter
- type "pytest" and press Return or Enter
- If you need to make any adjustments to your smoke test in order for it to pass, make the needed changes in Selenium IDE then export the test suite again.
-
Note: The CI/CD pipeline will start a local web server in the pipeline to run these tests. The pipeline is expecting the tests to run on port 5500 (which typically matches the Live Server port). If your tests are not using port 5500, you will need to update your .github/workflows/main.yml file. Look for this section of code in the file and update the port number.
- name: Startup HTTP Server for pipeline tests uses: Eun/http-server-action@v1.0.11 with: directory: . port: 5500 - Once the local build is successful, check your changes into the repository. This will kick off a new build that includes your smoke test.
- After you check the file in to the repository, go to the Actions tab to make sure the build is successful.
- Your pipeline now includes a smoke test!
Submission
-
Turn in a screenshot of the build detail page. The screenshot should include:
- The URL visible in your browser. This is to confirm that the tests ran in your own repository.
- The successful build that shows test_smokeTest.py (or similar) in the "Run Tests" step. Expand the Run Tests step to show the test_smokeTest.py (or similar) was executed.
- test_smokeTest.py program.
- smoke.side Selenium project file
Useful Links:
- Return to: Week Overview | Course Home | Canvas
