W02 Activity: RTM Test Case and Test Plan tutorial
Overview
The RTM tool allows us to create test cases and link them to the requirements and organize them in a folder structure. From these test cases, we can create test plans which allow us to test logical components or parts of the system. We will discuss test case executions in another page.
Test Cases
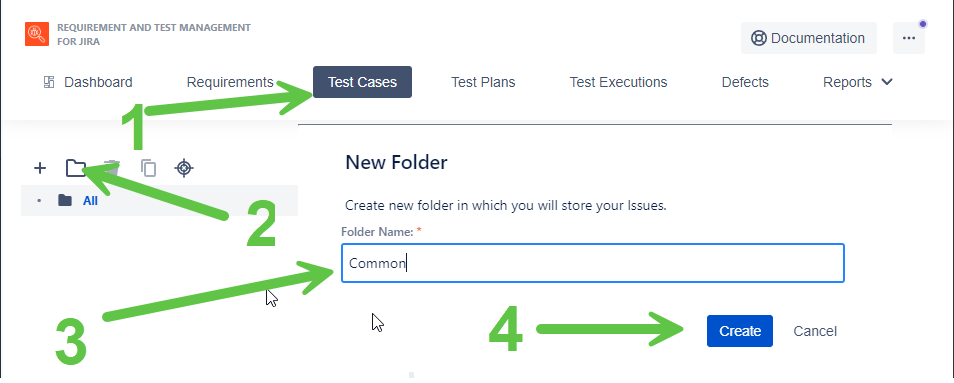
- As with the requirements, you will want to start by organizing your test cases into folders. Click on the Test Cases link at the top of the RTM app
- Click on the folder icon to create a new folder.
- Type your new folder name in the Folder Name box. You will want to create folders for Common, Home Page and Join Page.
-
Click Create when you are done to add the new folder.
RTM test cases folders -
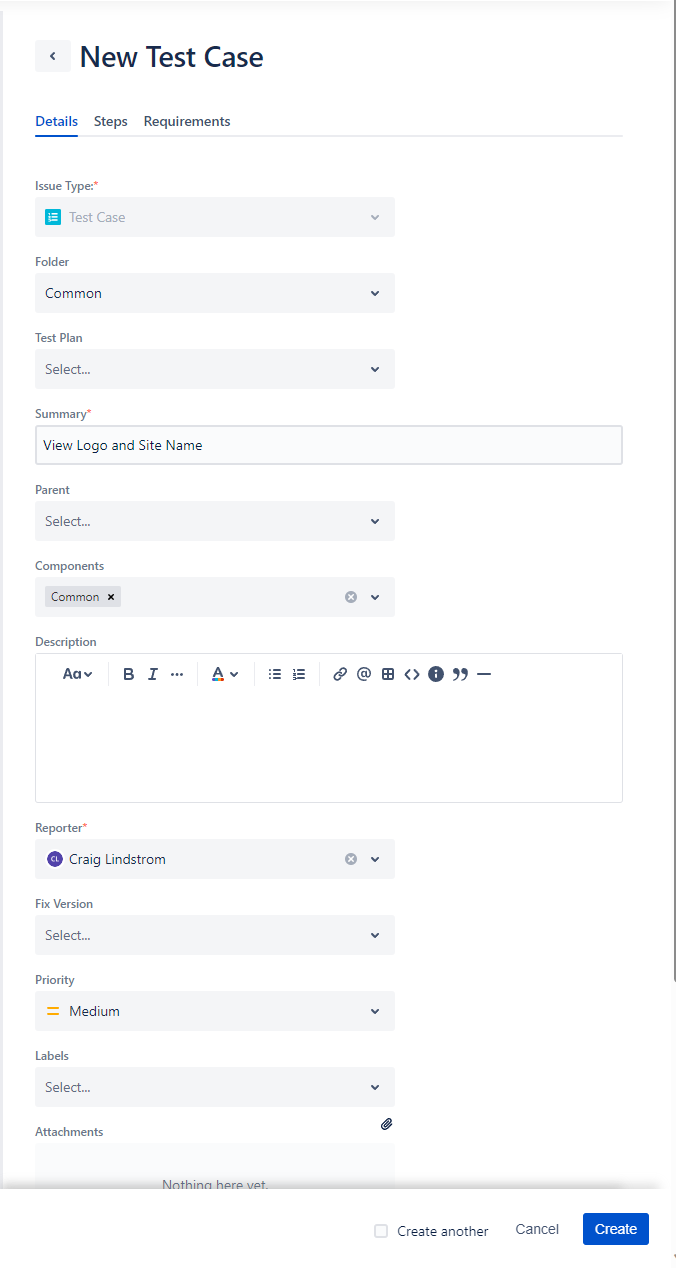
Now that you have organization folders you can create a test case. First select the folder you
wish to put the test case in and click the + icon or the blue Create Test Case
button.
- Verify the Folder chosen matches the folder where you want to put this test case.
- For now, leave the "Test Plan" box blank. We'll link that up later.
- Add a Summary description for your test case. This is a short sentence describing the primary goal of the test case.
- Choose the component that you will be testing.
- Leave the rest of the fields blank. We will set up the test case description in the "Steps" tab.
- Click the Create button to create your new test case.
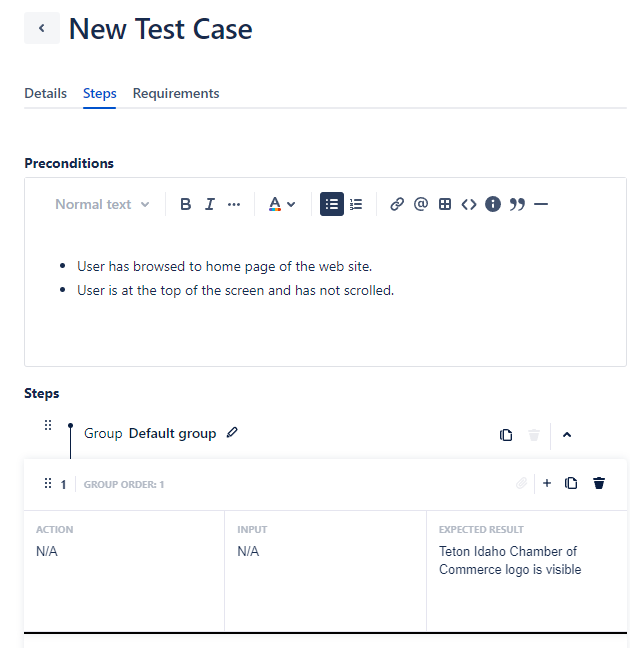
New test case. - Choose the "Steps" tab at the top of the New Test Case form.
- In the list of test cases, click on the Key of your test case.
- In the Preconditions box, add any preconditions that are necessary for the test. Example: "Browse to Chamber website."
- In the Steps area, click the + Create group of steps
- Add the Action, Input and Expected Result for each step. Example: Action: "Click Join button at top of page." Input: N/A Expected Result: "The user is taken to the Join page."
- If no action must be taken for a given step, put "N/A" meaning Not Applicable.
- If no input must be typed for a given step, put "N/A" meaning Not Applicable.
- Excepted Result should clearly identify what is expected.
Add as many steps to the test case as you think are necessary by clicking on the little "+" sign on the top right of the steps box.
-
Link the new test case you are creating to a requirement created previously. Click the Requirements tab and then choose the Add Requirement button.
-
You can limit the list of items you see by selecting a folder
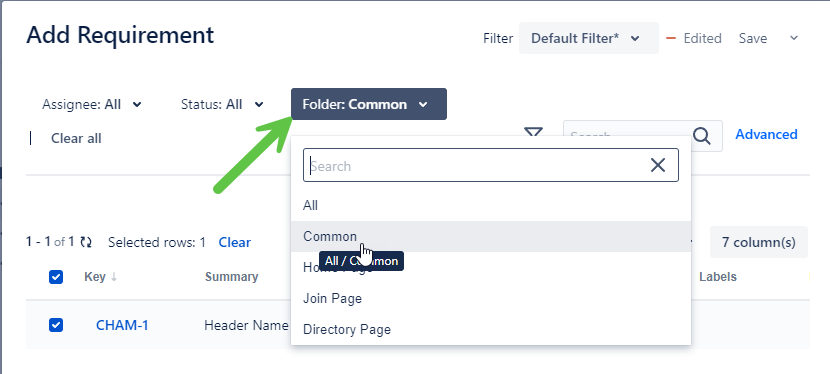
Select folder -
Select the checkbox next to the requirement(s) associated with this test. When done click the Add button.
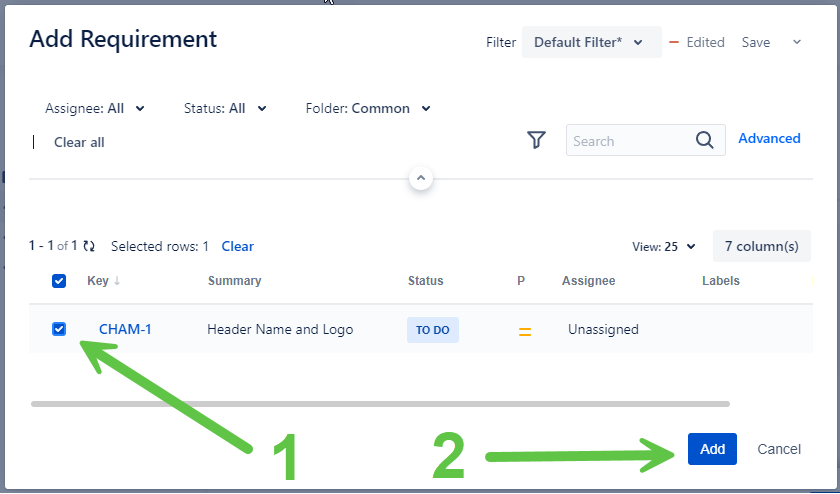
Select requirements -
Click the Create button to create the test case. Your test case will now show up in the folder structure on the side.
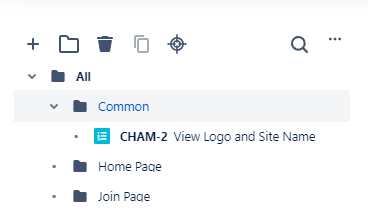
Test case folders -
Test Plans
Test Plans are used as a container for all the test cases that run to test a particular component or segment of the project. In this course, we will create a test plan for each page. It's most efficient to create all of test cases you intend to run before creating a test plan. As with other areas of the RTM tool, we will first set up a folder structure with Common, Home Page and Join Page as below.
-
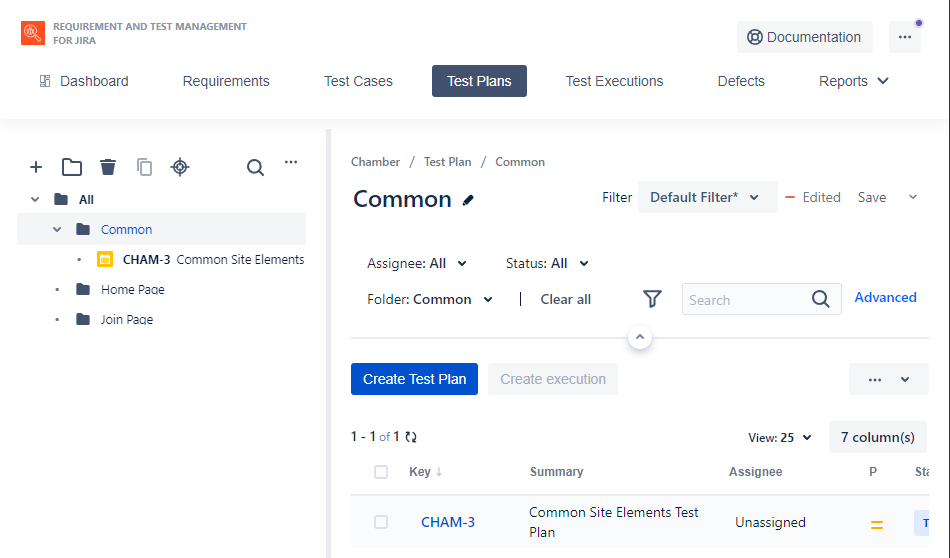
Select the Test Plans link at the top of the RTM screen. This will show a similar navigation structure as Requirements and Test Cases. You will want to organize your work, create Common, Home Page, and Join Page folders
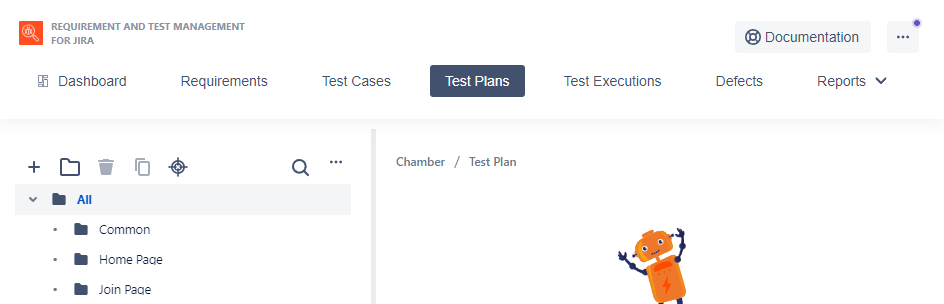
Setup test plans. -
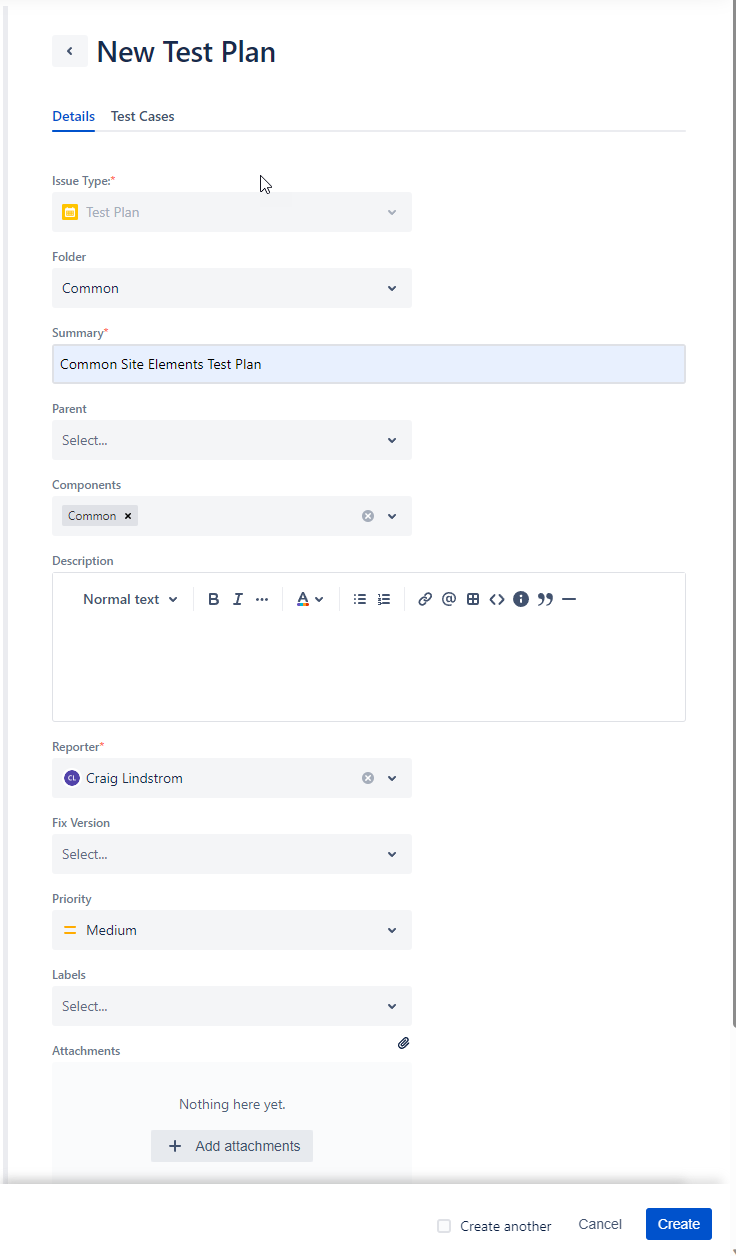
Create a test plan by clicking the + button in the navigation area, or the blue Create Test Plan button in the content area.
Add details about your test plan.
- Choose the correct folder where your test plan will live.
- Add a brief summary to describe this test plan.
- Select the appropriate component.
- For now, leave the description blank. This would be the area for notes about the test plan metadata as described in IEEE 29119-3.
Test pland details Add Test cases to the test plan. Click on the Test cases tab. Then click the Add to Test Cases button
- You can more easily find the related test cases by selecting the folder you want from the drop down.
- Add all the test cases you want to the test plan by selecting the checkbox next to the test case for each one. Click the "Add" button to add all the test cases to the test plan.
- When you are ready, click the blue "Create" button at the bottom right corner of the screen.
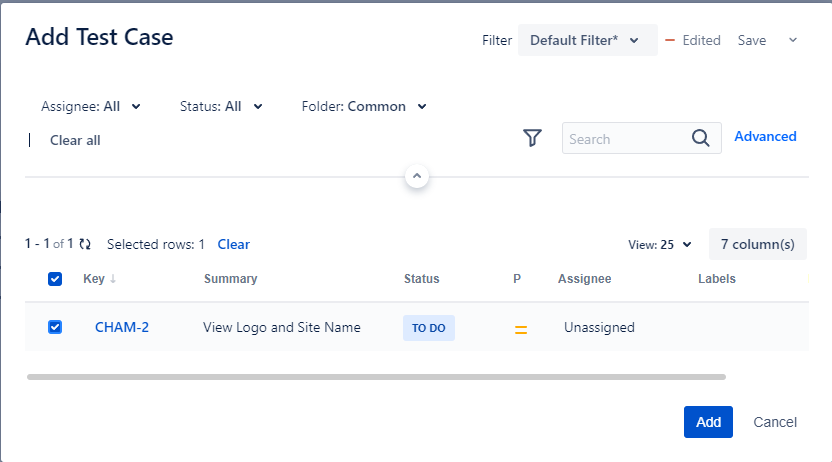
Add test cases. Once created, your new test plan will appear in the navigation section on the left as below.
Congratulations! Now you have created your test plans, you are ready to do some actual testing using test executions.
Submission
Useful Links:
- Return to: Week Overview | Course Home | Canvas