W04: Programming Task
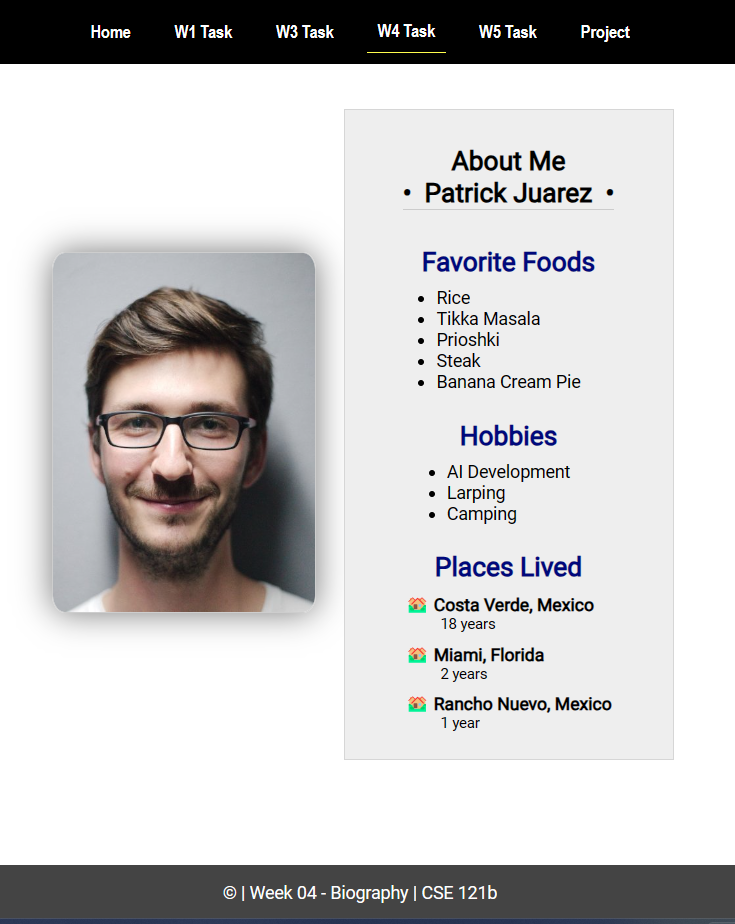
In your previous weeks' tasks, you declared and used individual variables. In this task, you are to rework the home page biography task from week 02 using object literals.
Instructions
Setup
- Download the starter files (2). Place the
w04-task.htmlfile on the rootcse121bfolder and thew04-task.jsfile in thescriptsfolder.
Object Literal
Do the following work in the
Do 🚫not alter your index.html file.
w04-task.js file which is linked to the
w04-task.html file.Do 🚫not alter your index.html file.
-
Declare a new object literal variable named
myProfileto hold information about yourself and assign an empty object to the variable.Check Your Understanding
let myProfile = {}; -
Add a property to this object literal named
nameand set its value to be your name as a string.Check Your Understanding
let myProfile = { name: "Patrick Juarez" } -
Add a property named
photo. Set its value to be an image's path and name (one used in Programming Task 2) as a string. -
Add a property named
favoriteFoods. Set its value to be an array of your favorite foods as stringsCheck Your Understanding - Example
favoriteFoods: [ 'Rice', 'Tikka Masala', 'Prioshki', 'Shrimp', 'Banana Cream Pie' ], -
Add a property named
hobbies. Set its value to be an array of your hobbies as strings. -
Add a property named
placesLived. Set its value to be an empty array. - Using code outside of the
myProfiledefinition, add an item to theplacesLivedarray where this new item itself is object with two properties:placeandlengthand for each of these properties, add appropriate values as strings.Check Your Understanding
// This occurs outside of the object definition. myProfile.placesLived.push( { place: 'San Francisco, CA', length: '1 year' } ); -
Add additional object literals with appropriate values to the
placesLivedarray for each place you have lived.
DOM Manipulation (Output)
-
Assign the value of the
nameproperty of themyProfileobject to the HTML element with an ID ofname.Check Your Understanding
document.querySelector('#name').textContent = myProfile.name; -
Assign the value of the
photoproperty as thesrcattribute of the HTML<img>with an ID ofphoto. -
Assign the value of the
nameproperty as thealtattribute of the HTML<img>with an ID ofphoto. -
For each favorite food in the
favoriteFoodsproperty,💡Use a forEach loop to iterate over thefavoriteFoodsarray.- create an HTML
<li>element (💡createElement), - place the value of the
favoriteFoodsarray element into thetextContentof this newlielement, and then - append this new
<li>element with content as a child of the HTML<ul>element with an ID offavorite-foods.
Check Your Understanding
💡What is the difference between append method and the appendChild() method when it comes to manipulating the DOM and adding elements to a parent element?myProfile.favoriteFoods.forEach(food => { let li = document.createElement('li'); li.textContent = food; document.querySelector('#favorite-foods').appendChild(li); }); - create an HTML
-
Repeat the previous process of creating a list of items for each hobby in the
hobbiesproperty of the object and appending each item to the HTML<ul>element with an ID ofhobbies. -
For each object in the
placesLivedproperty:- Create an HTML <dt> element and put its
placeproperty in the <dt> element. - Create an HTML <dd> element and put its
lengthproperty in the <dd> element
- Create an HTML <dt> element and put its
-
Append the HTML
<dt>and<dd>elements created above to the HTML<dl>element with an ID ofplaces-lived.
Testing
- Test your work by using Live Server and debug as needed.

Submission
- Commit and push your programming task work to your cse121b GitHub Pages enabled repo.
- Submit the URL of your rendered page on GitHub to Canvas.
💡Here is an example of what the URL should look like:
https://yourgithubusername.github.io/cse121b/w04-task.htmlor
https://yourgithubusername.github.io/cse121bis OK because each assignment is already included in the provided navigation structure on this home page for the course.
