W01: Programming Task
Overview
The purpose of this programming task is to:
- become familiar with the Visual Studio Code development environment,
- practice using the console and built-in stepwise debugger in a browser's DevTools environment,
- work with JavaScript variables, and
- publish your local work to your cse121b GitHub Pages remote space.
All of the programming work for this class will be stored in your local cse121b repository folder established in the assigned setup activities and then a copy will be pushed (uploaded) to your remote GitHub Pages cse121b repository for assessment.
Instructions
🚑 If you get stuck or are confused by the overall workflow, there
is a 🎦 video overview of this task provided at the end of this document. A wise student works
through the written
material before viewing any answer key.
Setup

- Open Visual Studio Code (VS Code) and open your existing, local
cse121brepository/folder that you established during the setup activities. - Download the starting
files and unzip them for file management.
Downloading and unzipping are completed outside of VS Code using the operating system and/or other tools. How to Unzip Files.
- Move the files (2) into the
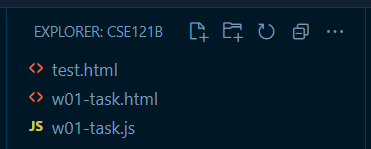
cse121bfolder. Drag and drop using VS Code's Explorer panel or use your operating systems file/folder management tool to do this. The file will be viewable in VS Code once you move them into the folder.💡Normally, JavaScript files (.js) are stored in a folder namedscriptsorjs, however, for this first assignment, we will store it in the same directory as the .html file.
HTML
- In VS Code, open the
w01-task.htmlfile. - Replace the
<h2>content with your full name. - Save those changes.
💡Saving often is a good idea or even better, set VS Code to
auto-saveunder theFilemenu.
Console
The console is a tool that allows you to see what is going on in the code. It is a simple
output mechanism where you can see the values of variables and the results of calculations. It
is
also a place where you can type in commands and see the results of those commands. Programmers
will often output to the console temporarily to debug issues in the code.
- In VS Code, right mouse click the w01-task.html file and click Open with Live Server to have it open in a default browser tab/window.
- Open the browser's DevTools (Inspect).
- Click on the Console tab.
- ✅ Verify that you can see in the console that the program wrote one line of output and then produced an error.
💡Alternatively, you can toggle the DevTools drawer view which can
contain the console panel by clicking
esc. Specific tools can be added as panels
by using the + (More Tools) button.Stepwise Debugger
Part 1: Error - Assignment to constant variable
- Click on the Sources panel and use the Navigator tab to find the w01-task.js file. Select it.
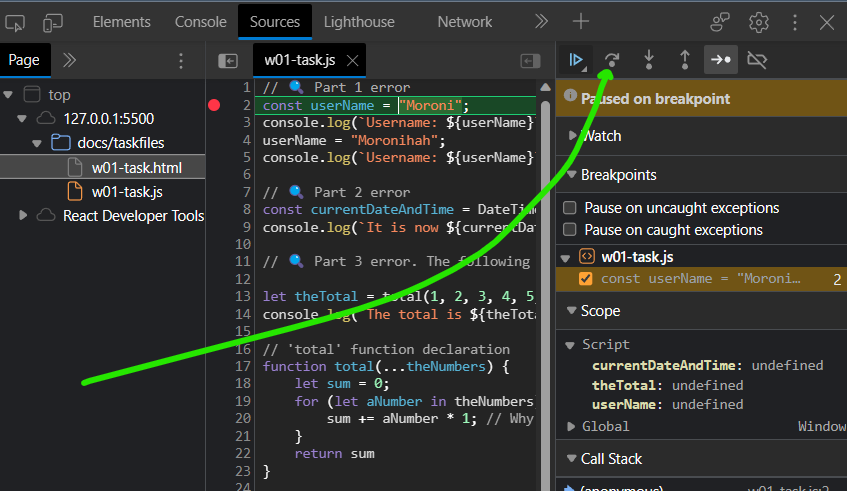
- In the Debugger view panel, you will see a column of numbers indicating the line numbers for each line in the JavaScript code file. This column is called the 'gutter'. Click on the 2. You will see an indicator show up in the gutter. This indicator is showing you where a 'break point' has just been set in the code. Breakpoints are how you temporarily pause the code's execution so you can slow the program down and "step" through the program manually. This is the stepwise debugger.
- Click the browser's refresh button to render the page again. The browser will go into debugger mode.
- Line 2 of the code will be highlighted. It has not executed. To execute this one line of
code and only this one line of code, click the Step Over Next Function Call
button.

Figure 1: Screenshot in DevTools Marking the 'Step Over' Button It is also OK to use the Step button (shown highlighted in the image). - Now the variable
userNamewas assigned the value Moroni. You can hover your mouse pointer over the userName variable in the debugger and it will show you the assigned value. - Click the Step Over ... button two (2) more times. This will produce an error on Line 4 when the debugger tries to process that line of code. This is the part 1 error.
- In the Console panel, note that line 3 produced output and an error was produced.
✅ Verify that you see these two console output lines.
Figure 2: Screenshot of Console Panel with Part 1 Error - You can then click on the linked line number in the error line or even view the ❌ at the
end of the line number in the debugger window.
❔How can you fix theAssignment to constant variableerror?We will assume that we actually do want to reassign theuserNamevariable.Solution
Declare the
userNamevariable withletversusconst. - ☑️In VS Code, with the w01-task.js file open in the editor, fix the 🔍 Part 1 error and view the results in the browser's console panel.
Part 2: Error - DateTime is not defined.
- With the page running in the browser and DevTools open, click off the breakpoint on Line 2 and set a breakpoint on Line 8.
- Refresh the page to render the page again and it will stop on Line 8.
- Click Step Over and view the error.
DateTime is not defined. The program thinks you are referencing a variable name since DateTime is not in its library. - Fix the problem by researching how to display the current Date and Time in JavaScript in an easy way.
- ☑️In VS Code, with the w01-task.js file open in the editor, fix the 🔍 Part 2 error and
view the results in the browser's console.
Solution
One simple solution is to use the
Date()object.
const currentDateAndTime = Date();
Part 3: Error
Remember that the intent of this assignment is NOT for you to be able
to solve all the errors with the JavaScript. Rather, it is to become familiar with debugging
using DevTools and to edit and publish the page with its referenced JavaScript.
- With the page running in the browser and DevTools open, remove all the breakpoints in the debuggers gutter of line numbers.
- The program does not produce any red-lined reference errors at this point.
✅ Verify that the console output looks like this:
Figure 3: Screenshot of Console Panel with Part 3 Running - Add a breakpoint on Line 13.
- Step through the program using Step not Step Over, identifying the flow of the program step-by-step.
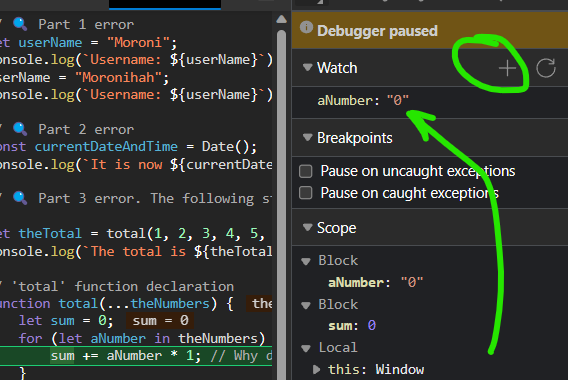
- In the debugger, add a Watch value on the
aNumbervariable by clicking the plus symbol on the Watch panel and entering "aNumber". - Keep stepping through the program and observe the flow and that "aNumber" watch value.
- ✅ Confirm that the first value assigned to it after being "undefined" is "0", a string.

Figure 4: Screenshot of Debugger Watch Panel - Try to determine the problem.
- It is NOT required that you fix the code for this error.
Solution
In JavaScript, the for ... in loop is used to iterate over the properties of
an object, not for iterating over the elements of an array. When used with an array, it
iterates over the indices of
the array, not the actual elements. Thus returning 45 as the indices are 0 to 9. The
solution can be to change the for loop to a for ... of loop. The function
should return 55.
🚑 Task Demonstration
Submission
- Complete all the marked ☑️ fixes to the JavaScript code.
- Commit your changes to your local repository.
- Push your changes to the cse121b GitHub Pages enabled repository.
- Be prepared to submit the complete URL to your w01-task.html file.
💡Here is an example of what URL you will be submitting:
https://yourgithubusername.github.io/cse121b/w01-task.html