Visual Studio Code
Visual Studio Code (VS Code) is a free, cross-platform code editor by Microsoft, available for Windows, macOS, and Linux. It also offers a web-based version at vscode.dev.
VS Code includes support for debugging, embedded Git control, syntax highlighting, intelligent code completion, snippets, and code refactoring.
Video Demonstration: ▶️ Visual Studio Code Introduction – [ 1:24 minutes ].
Installing
- Download the installer from the Visual Studio Code website and run the installer
- Carefully following the installation instructions for your operating system.
Customizing
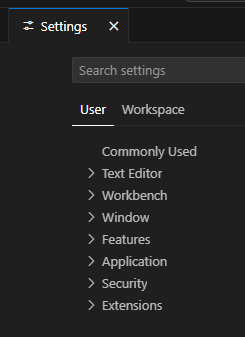
A lot of the customization of VS Code can be controlled in the Settings panel. To open the Settings panel, do the following:
- Windows/Linux:
File ► Preferences ► Settings
or use the keyboard shortcutCtrl + , - macOS:
Code ► Settings... ► Settings
or use the keyboard shortcut⌘ + ,
Auto Save Files
- Open the Settings panel.
- Type "auto save" in the search box.
- In the Files: Auto Save section, change the dropdown menu from off to afterDelay.
- Set the delay to your preferred time in milliseconds in the Files: Auto Save Delay
section.
The default is 1000 milliseconds (1 second).
Documentation: 📑 Save / Auto Save
Auto Format Code
- Open the Settings panel.
- Type format in the search box.
- Check the box in the ☑️ Editor: Format on Type section.
- Check the box in the ☑️ Editor: Format on Save section.
- Check the box in the ☑️ Editor: Format on Paste section.
Documentation: 📑 Formatting Code
Documentation: 📑 HTML
formatter is based on js-beautify
Auto-Update Tags
When modifying a tag, the linked editing feature automatically updates the matching closing tag.
- Open the Settings panel.
- Type linkedEditing in the search box.
- Check the box in the ☑️ Editor: Linked Editing section.
Documentation: 📑 Auto-Update Tags
Managing Extensions
- In the VS Code menu bar, click
View ► Extensions or open the extensions
panel by pressing the the shortcut
⌘+Shift+X[Mac] orCtrl+Shift+X[Windows/Linux]. - Search for the extension you want to install.
- Click the Install button.
- Manage extensions by clicking on an installed extension in the Extensions Panel to open it as a separate tab in order to view, auto-update, restart, disable, or uninstall installed extensions.
Documentation: 📑 VS Code Extensions
Editor Themes (Color and File Icons)
- To change the color theme, click File ► Preferences ► Theme ► Color Theme and make a selection.
- To change the file icon theme, click File ► Preferences ► Theme ► File Icon Theme and make a selection.
Additional color themes can be found through VS Code Extensions. Example, Winter is Coming
User Snippets
Snippets are templates that can be inserted into your code. VS Code includes support for user-defined snippets.
- To create a snippet, click File ► Preferences ► Configure Snippets and select the language for which you want to create a snippet.
- Enter your snippet code in the json file.
Video Demonstration: ▶️ User Snippets – [ 7:19 minutes ]
Documentation: 📑 User-Snippets
Emmet – Code Shorthand
Emmet is a web-developer's toolkit that can greatly improve your HTML & CSS workflow. Support for Emmet snippets and expansion is built right into Visual Studio Code, no extension required.
Example: Type html:5 + press Tab and the result in the following in an HTML
document:
<!DOCTYPE html>
<html lang="en">
  <head>
    <meta charset="UTF-8">
    <meta name="viewport" content="width=device-width, initial-scale=1.0">
    <title></title>
  </head>
  <body>
  </body>
</html>
Example: Type ol>li*5 + press Tab and the following HTML will be generated:
<ol>
  <li></li>
  <li></li>
  <li></li>
  <li></li>
  <li></li>
</ol>
Documentation: 📄 Emmet