Windows MySQL Workbench Installation
-
Download MySQL Workbench installer from https://dev.mysql.com/downloads/workbench/. Note: Version numbers may be different than shown
in images. You should see the following page:
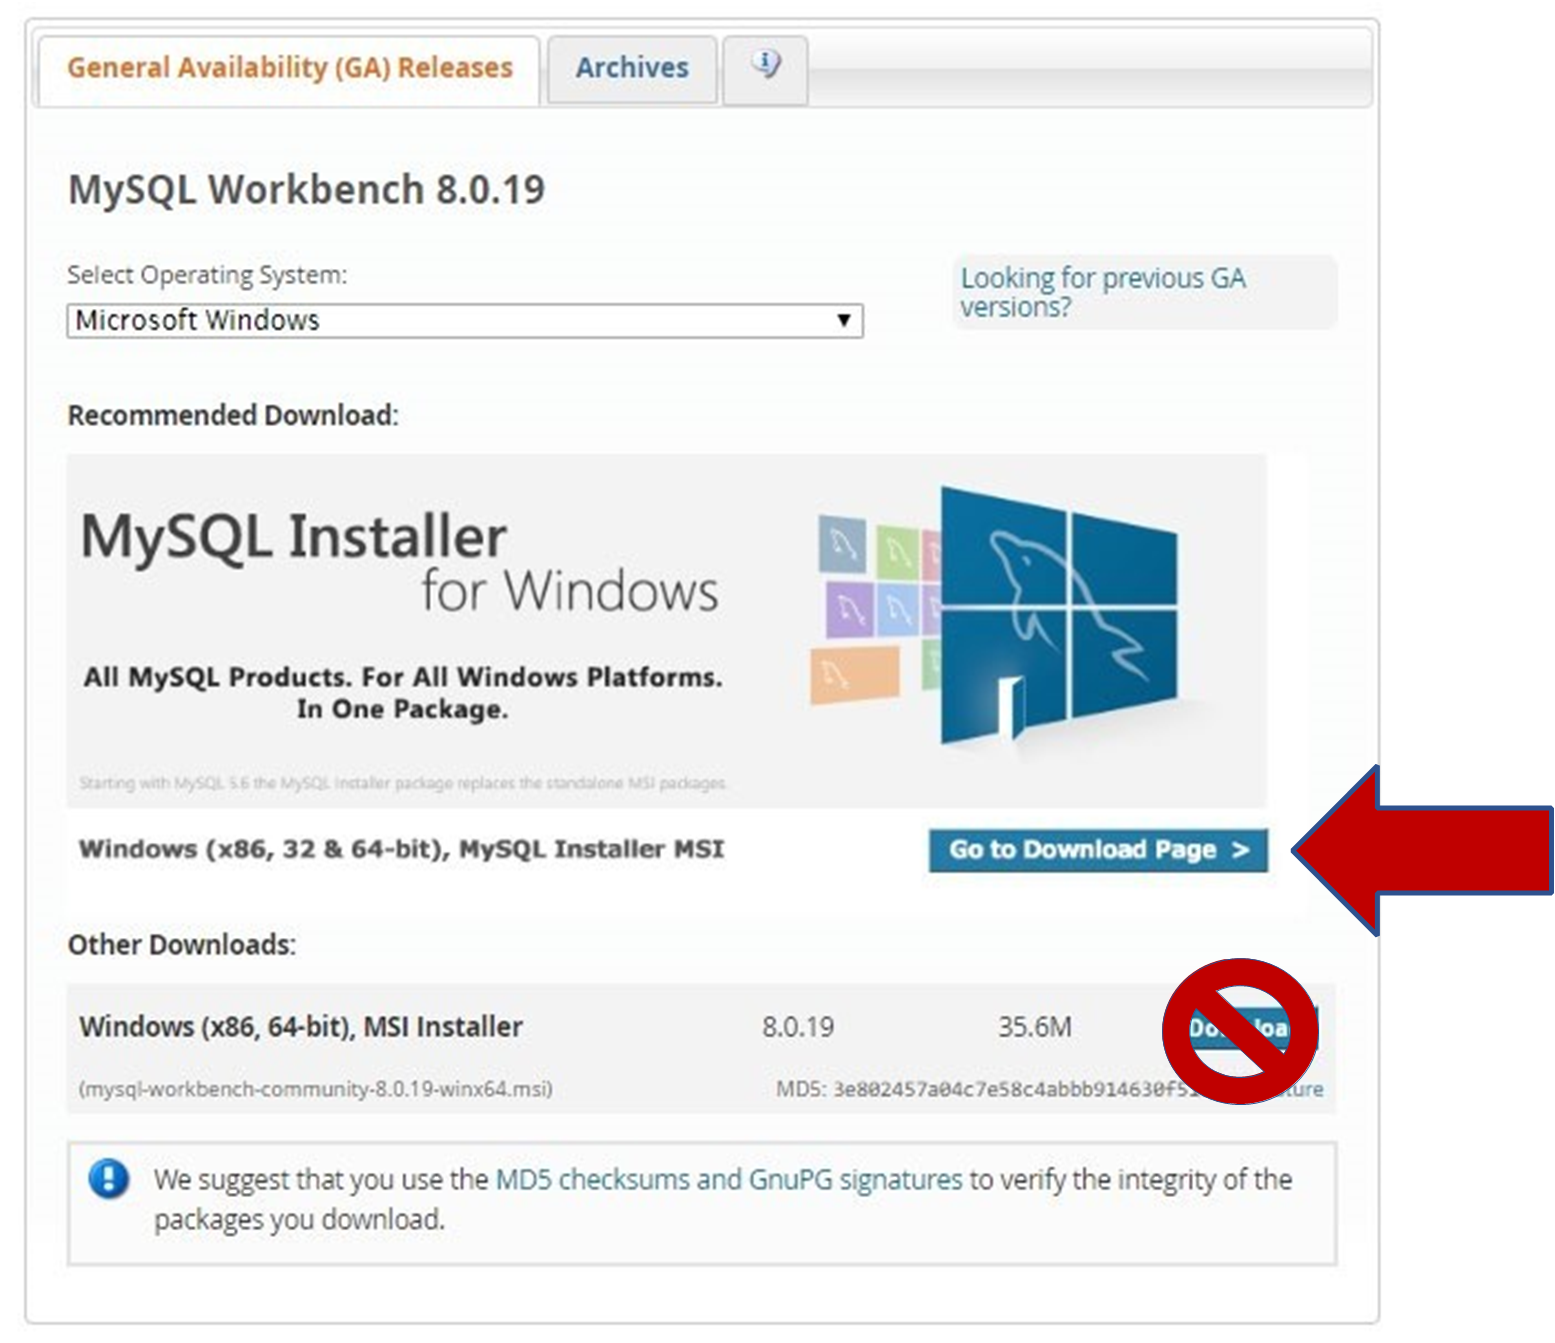
- Click on Go to Download Page.
-
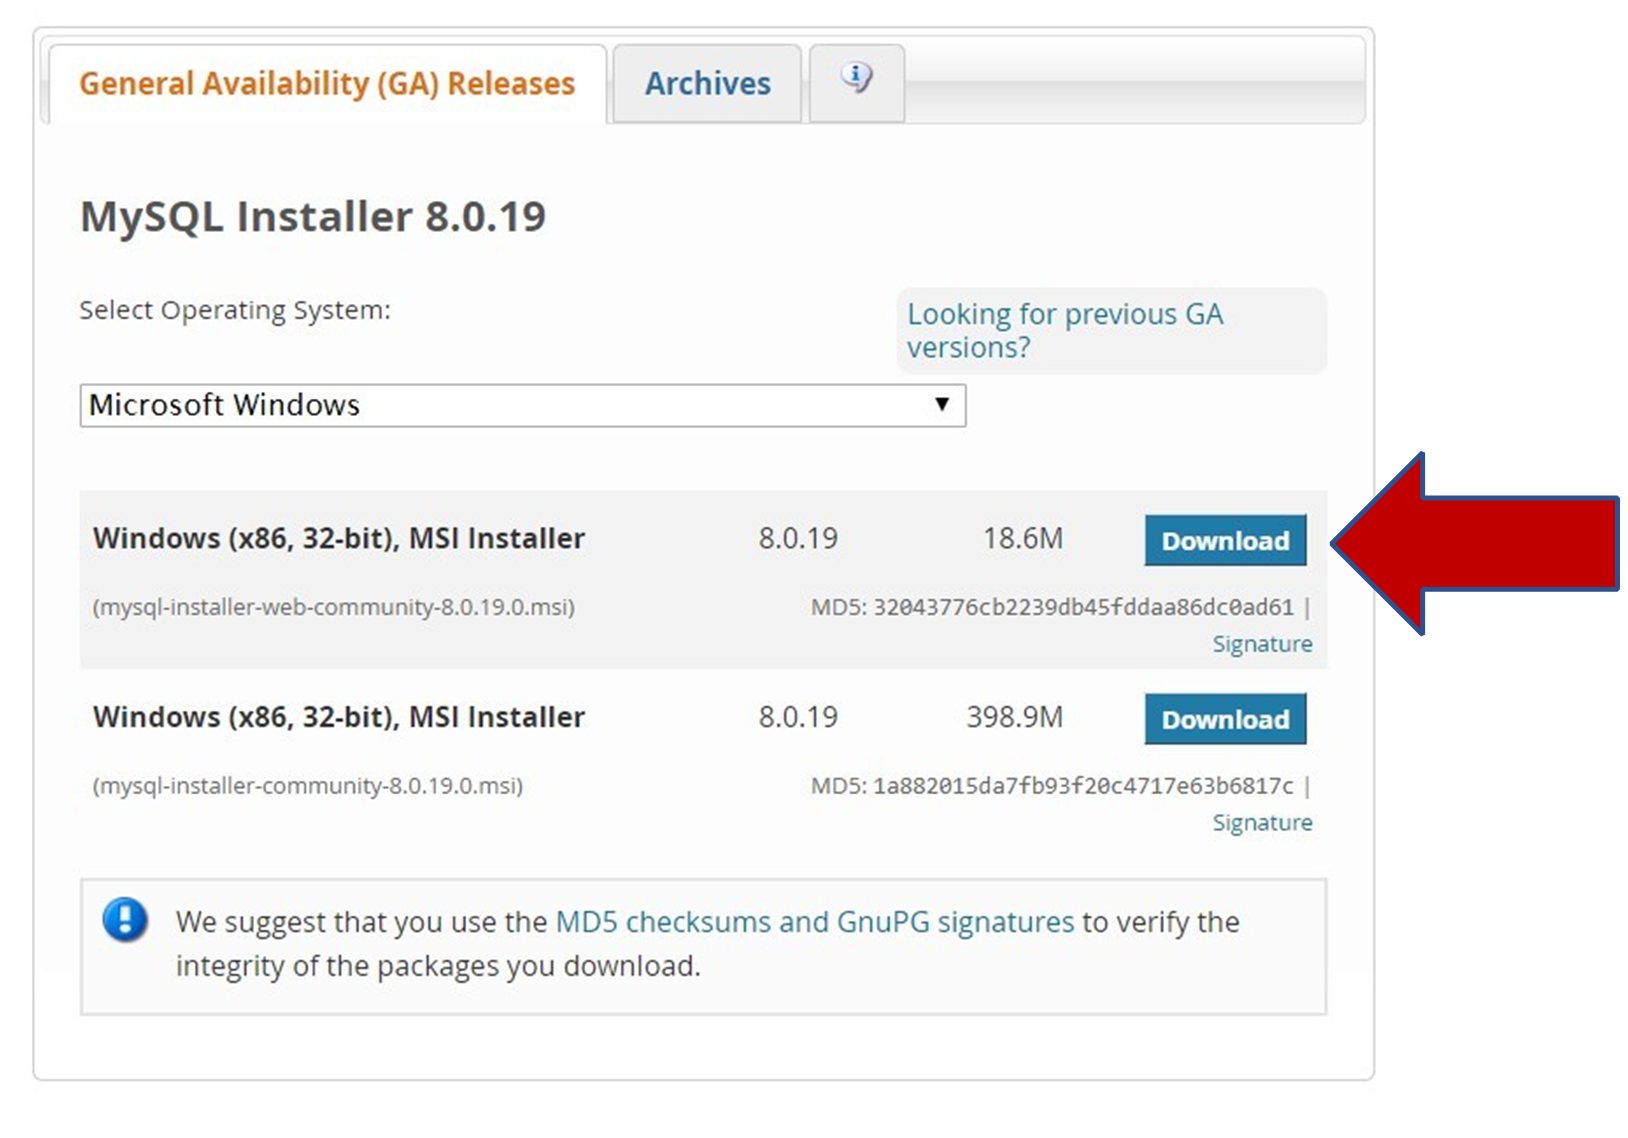
Click the Download button next to the ..-web-community-.. MSI Installer. (The top one).
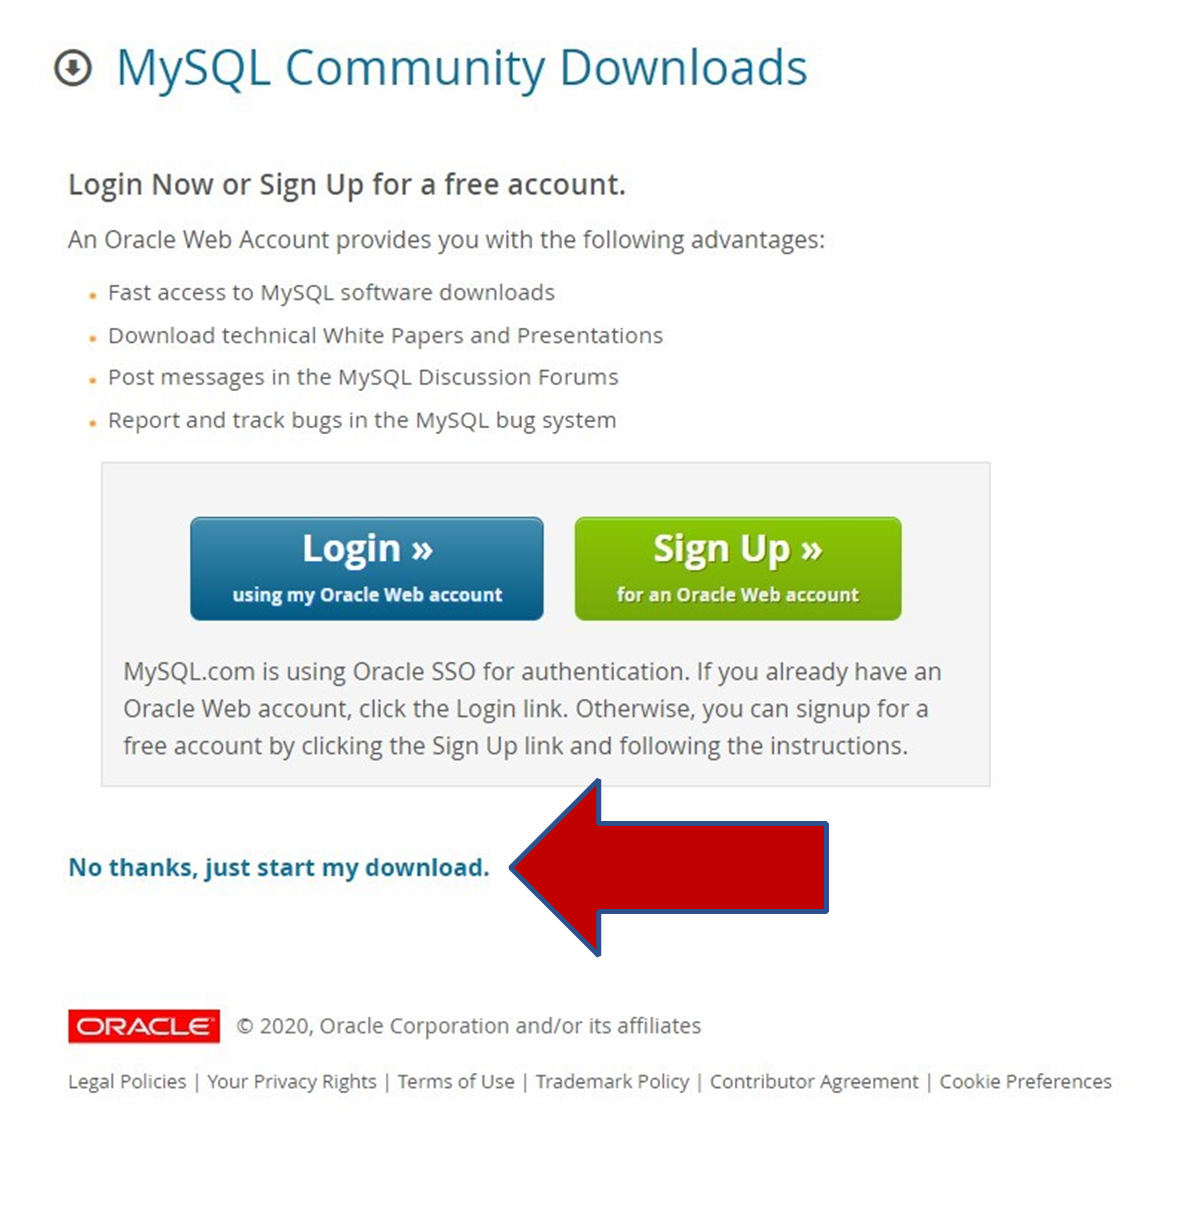
- Click the No thanks, just start my download. link.
-
Run the downloaded file and allow the app to make changes to your system.
-
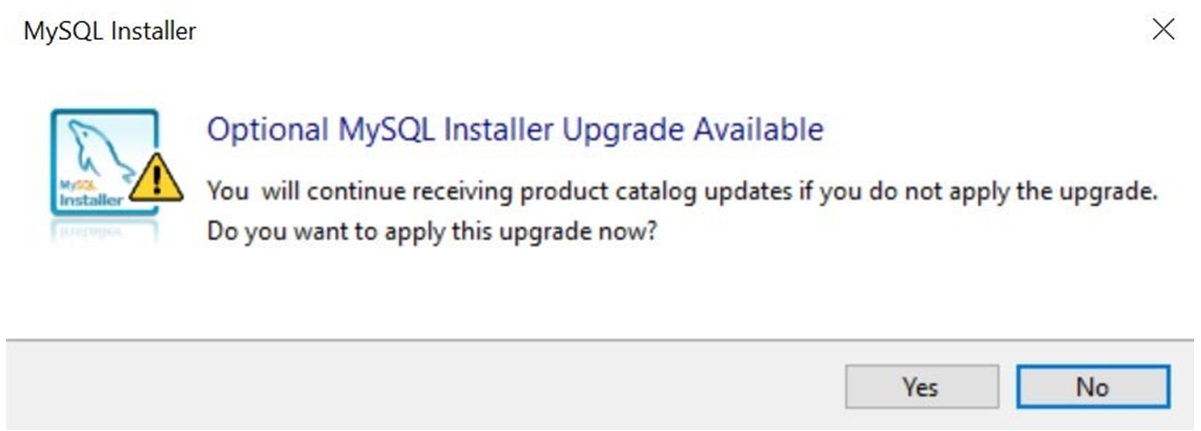
You may see an option to upgrade the installer, this is not necessary, but you may if you wish.
-
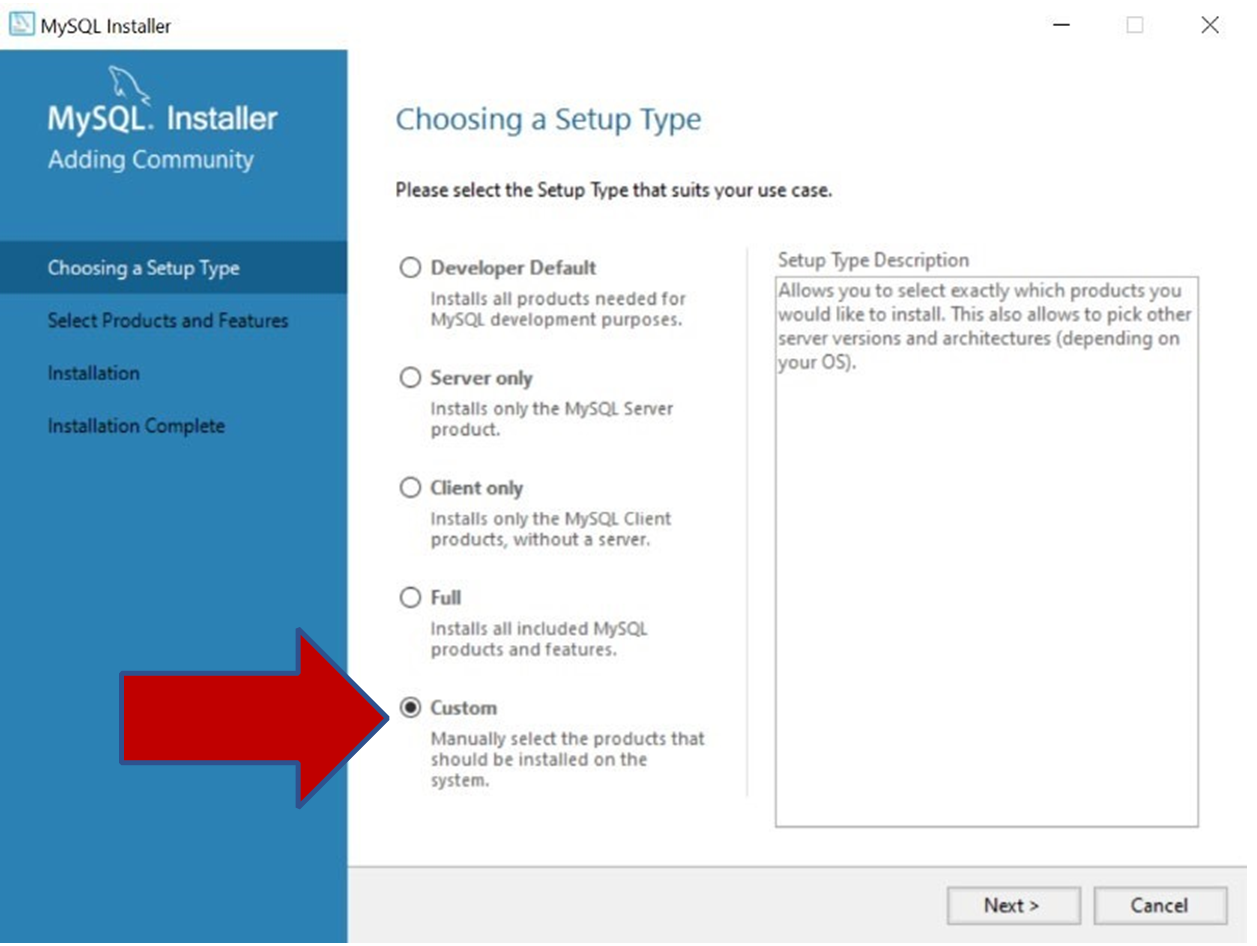
Choose the Custom option then click Next.
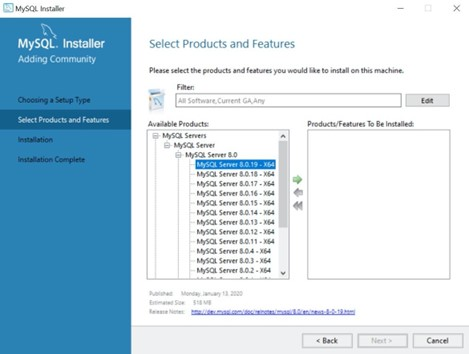
- Click the plus sign next to MySQL Servers and the plus sign next to MySQL Server and then again next to MySQL Server 8.0 and click and highlight the latest version. Click the green arrow once it's highlighted to add it to the window on the right.
- Collapse the expansions by clicking the minus signs.
- Under Application find the latest MySQL Workbench and add it to the right window.
- Under Documentation find the latest MySQL Documentation and add it to the right window.
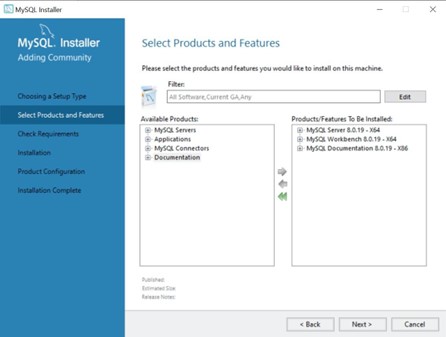
- You should now have at least all the items showing above, click Next:
-
At this point ONLY SOME OF YOU will get a screen that looks like the image below.
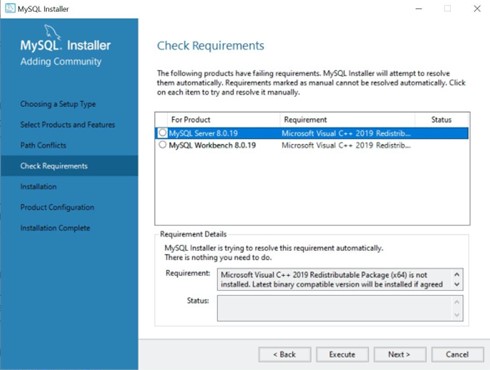
If you do, click Execute top add the required components. Complete the component installer by agreeing to the license terms and conditions then click Install. Once it's installed click Next.
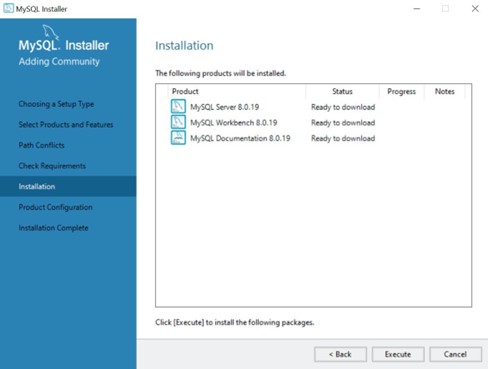
- Click Execute to start the installer.
- The installer will install each selected component. When complete click Next
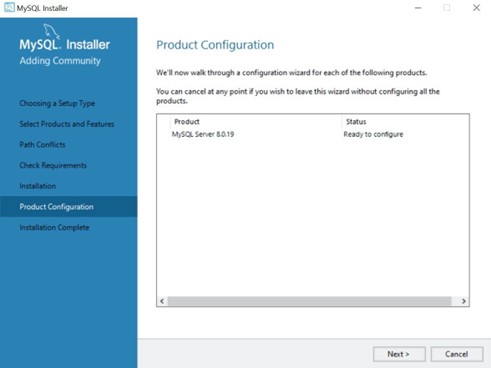
- You should be back at the Product Configuration windows. Click Next
-
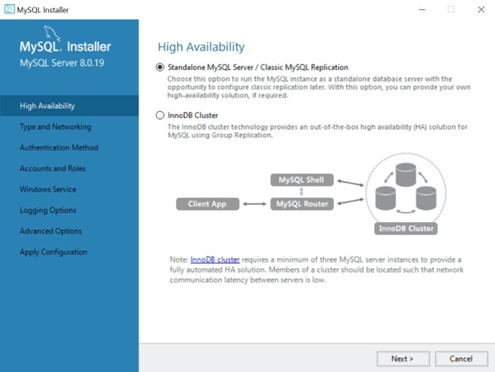
Leave the Standalone' default here and click Next:
-
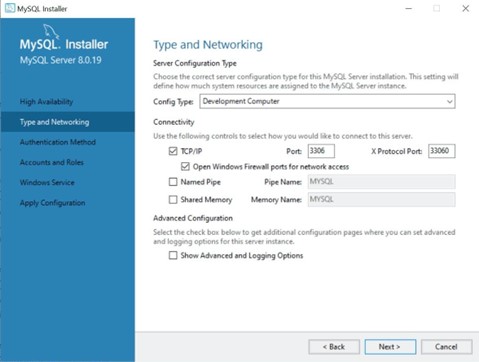
Leave all the defaults in the Type and Networking window as well and click Next:
-
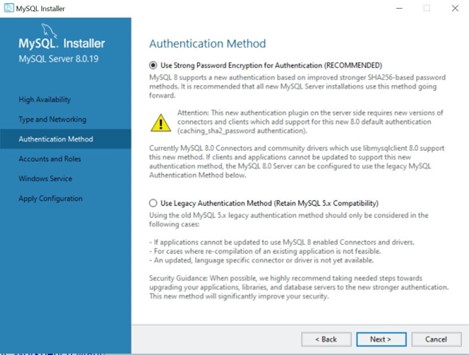
Leave the Use Strong Password' default and click Next:

-
In this next window you need to add a root password that you should never forget. It can be super simple and easy to remember. Even the password, 'password' works. If you forget this password and get locked out of Workbench, it is a huge process to get back in. So, keep it simple and easy to remember, and don't forget it. This won't be an industry server that needs to be secure. A simple password is fine.
Enter the password you want and click Check and Next.

-
Keep the defaults for the Windows Service settings and click Next.
-
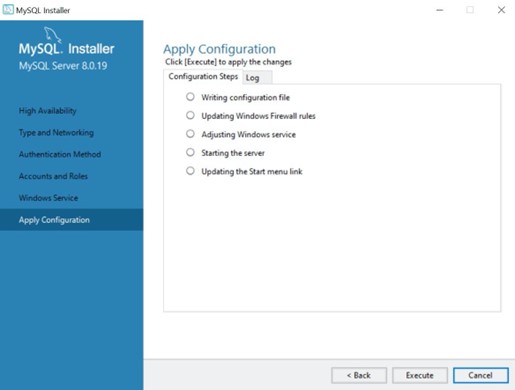
At the Apply Configuration window click Execute. It will check off the steps. Then click Finish.
-
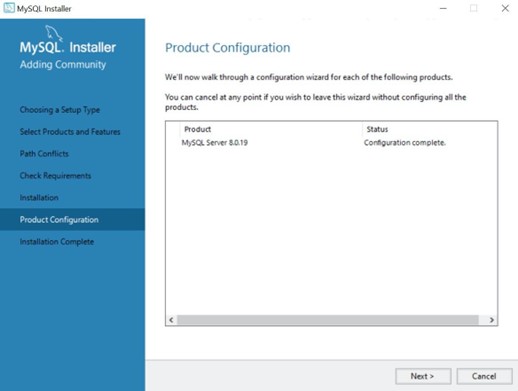
At the Product Configuration window click Next.
-
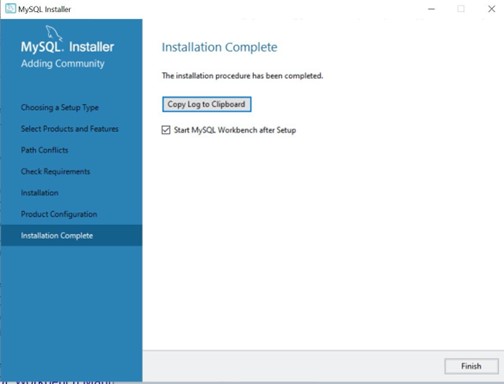
Workbench is now installed. Start workbench if it didn't start automatically. You should see a Local Server instance like below:
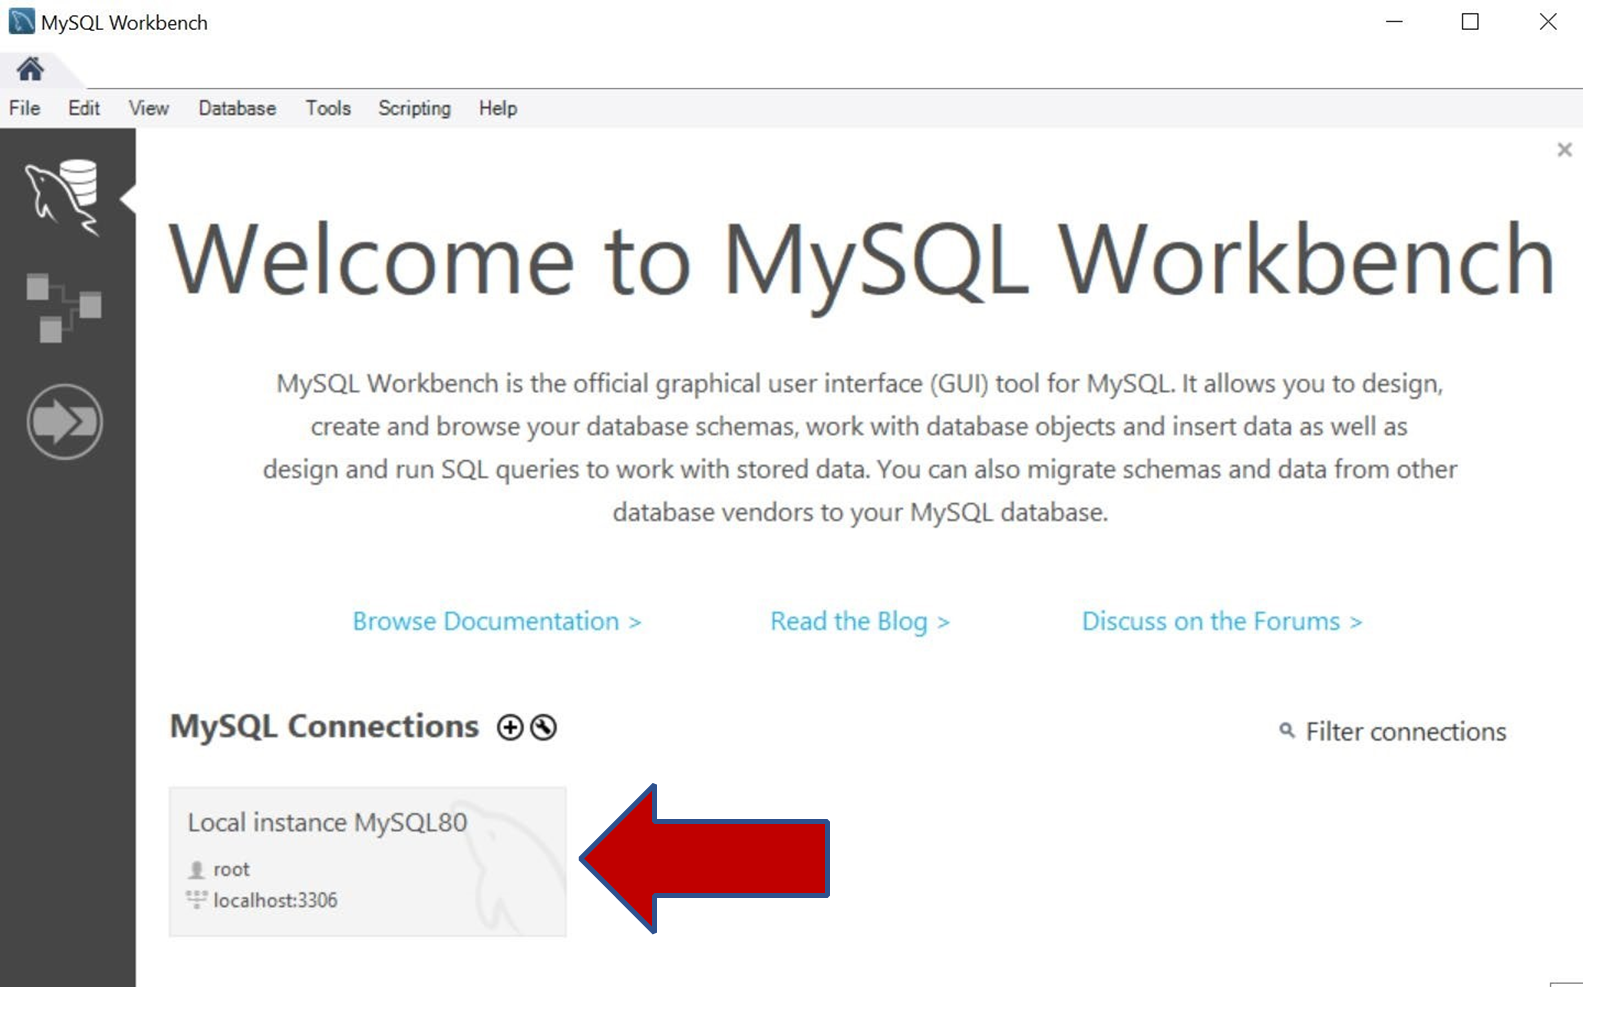
This indicates the server was installed that is needed to run Workbench. This server will be running all the time, which shouldn't ever effect your computer. Remember you need it on to run Workbench properly. But if you need to ever turn it off for some reason, then click your Window icon and just start typing 'services' and open the Services app. Scroll down to MySQL 80 and click it. You should see on the left an option to stop the server if you ever need to. It's a small link that says 'Stop'. I would suggest not clicking 'Stop' and just leave it running. Congrats you got it all installed.
Useful Links:
- Return to: Install MySQL Workbench
- Go to: Week Index • Course Home • Canvas